Katsudon – Pork Cutlet Bowl with Rice

katsudon2

Unofficially, I ended up sorting through Japanese recipes here in my March posts. As someone who has moved from one country to another, from city to city, I have never felt that I had a place to really call home. Japanese cuisine and, of course, my partner, are essentially my home, allowing me to  feel most comforted wherever I am; maybe that’s what I’ve been needing lately.

Undoubtedly, when I think of comfort food, katsudon comes to mind. I recall working at one of the reputable tonkatsu (specializing in pork cutlets) restaurants, called Wako, in Shinjuku during my university year, honing my skills in the kitchen with an enthusiastic Japanese chef and another chef who had French cuisine training under his belt. I learned not only how to cook but also why we cook. The ultimate answer was the pleasure of serving good and delicious food to those who love to eat! This mentality has always been inside of me, both before and after this experience, and to this day I remain unchanged. I wish I could track down those colleagues who cooked the most intricate and delicious lunches for us employees every single day–we had the greatest team in the kitchen!

chive_plant3lamb's_lettuce_radicchio_chives radicchiokatsudon3

Katsudon – Pork Cutlet Bowl with Rice

The key to restaurant-quality katsudon is all about using good quality pork and bread (plus the secret sauce). My soba sauce recipe is very similar to what I used to concoct every week in a huge batch within Wako’s kitchen. Thus, I still make batches big enough to last for a few months in my fridge, and I ensure that they keep moving with me, wherever I go! The best texture is achieved by making your own homemade panko on which you nestle the pork, creating a veritable bed of sweet, fluffy panko. The size of the skillet matters as well; try to use the smallest one in which you can fit all the ingredients in order to ensure even cooking during the shortest possible time.

Serves 2

2 pork centre loin pieces, about 1 inch thick, boneless

Salt and pepper

All purpose flour

1 egg + 2 tablespoons water, beaten well

2 cups fresh white bread, torn in large pieces (for making panko)

Oil for deep frying

½ onion, sliced into ¼ inch pieces

3 tablespoons soba sauce or more to your liking

Or a mixture of 1 tablespoon sugar, 2 tablespoons soy sauce and 1 tablespoon mirin

2 eggs, beaten very lightly

Green onions, scallions or chives, chopped finely

Cooked white rice

Rinse and pat the pork until dry. Season with salt and pepper. Place the bread pieces in a blender and roughly grind until they look like large snowflakes. Don’t grind to the size and texture of store-bought panko, as larger flakes are key to making the pork cutlet fluffy and textured.

Prepare the breading station by placing flour, beaten egg, and breadcrumbs in separate shallow bowls.

Do one piece at a time. Evenly coat the pork with flour, removing the excess, and then coat with egg. Lay the pork on the bed of breadcrumbs and cover the top with plenty of the crumbs as well. Press gently but firmly. Refrigerate, covered with a piece of clean wrung cloth or Saranwrap, for at least 10 minutes to moisten the breading. This makes breading adhere well and ensures an ideal texture.

In the meantime, warm oil to 345 to 355 F in a deep-rimmed pan, enough for deep frying.

Deep fry the pork until golden brown. Flip when halfway done. Test the doneness by slicing the thickest part. It is finished if the pork is light pink in colour and the juice is clear. Rest the pork on a rack for 5 minutes. Slice into pieces that are easy for you to eat.

Place the soba sauce, or the mixture of sugar and soy sauce, plus 2/3 cup water in a small skillet over medium heat. Cook the onion until tender. Place the sliced pork pieces in the skillet, and pour some sauce over top; cook for a couple of minutes. Pour the lightly beaten eggs over top, cover with a lid and cook for another 15 seconds, until eggs are half cooked. Serve over the cooked white rice, scattering the green onions on top.


Udon Noodles: Going Back To the Basics

udon_noodle

Lately, I have been enjoying doing old things. It seems like I’m against the current of modern technology of this day and age, but it just feels right in my own skin. Having started shooting using film is one of them. I truly enjoy the process of taking a photograph. Everything slows down. Unwrap a roll film. Load it and wind it on a spool, wind again to finally be able to shoot. It’s peaceful. Carefully choose a subject and think about a composition, so as not to waste one precious shot out of 10. Now decide on the aperture, take light metering and settle on the shutter speed. Concentrate. Focus. Duh, take off the darkslide, which I often forget to remove! Wait for the right moment. Press the shutter, hoping that neither my subject, nor I, have moved a mere inch. “Dung,” the heavy sound of mirror movement and shutter action completes all that it takes to photograph one scene, and that excites me very much. And yet, I won’t know if I managed to come away with the shot until the film is developed. I have become patient. Cock the shutter, advance the film and start all over again. I get indescribably giddy.

udon flour

So going back to the old things, for this post, I made udon noodles for you in the traditional way that some Japanese people still do. It is a time consuming process, but if you are looking for something to clear your mind or are trying to settle your anxiety, or if you are like me, just like to use your hands to make food, it is like a type of meditation. At least, the result is certainly worthy: a warm, utterly satisfying bowl of noodle soup.

flour

mixing

kneading

udon dough

rolling the dough

udon noodle

Udon Noodles and Soothing Soup

Feeds 8 – 10 people

1 kg all purpose flour

Salted water (50g salt and 450 g water)

Cornstarch for rolling the dough

Topping

Green onions, scallions or chives, finely sliced

Soup (serves 3-4)

2 x Kombu (about 4 x 4 inch pieces), make some slits in it with kitchen scissors

2 cups bonito flakes

5 tablespoons mirin

5 tablespoons light coloured soy sauce (usukuchi soy sauce)

or Soba sauce (see the recipe)

Sea salt

Dissolve salt well in 450g of water. Place the flour in a large bowl and add the salted water. Combine until there is no dry flour left. Form into a ball.

Place the dough in between two sheets of clean plastic sheets or Saranwrap on a sheet of clean cloth on the floor (yes, the floor!). Step on the dough with your clean feet. Fold it, step on it to stretch it and fold again. Repeat until the dough becomes smooth. Try not to let the air get inside the dough when you are folding. Match the corners neatly while folding so that it becomes a tidy small mass. Form into a ball.

Rest the dough in an airtight bag (or wrap tightly) at room temperature, 1 hour in summer time or 2 to 3 hours in winter.

In the meantime, make dashi stock. Wipe and clean the piece of kombu with a wrung wet cloth. Do not wash, as flavour leaches away.  Fill a large pot with 1.5 L of water and place the kombu inside. Let sit for 20 minutes to let umami leach into the water.

Warm up the pot over medium heat and, just before water starts boiling, remove the kombu from the pot. Don’t cook the kombu, as it gives off an unpleasant odor and taste.

Add the bonito flakes and bring to a boil very briefly: remove from heat. Do not boil the bonito, as it also makes the dashi unpleasant to taste. Leave the dashi until the bonito has sunk to the bottom of the pot and infused the stock. Strain the dashi stock into another pot. Warm up, and add mirin and soy sauce. Adjust with salt. Or, if you already have the soba sauce made, you can add 8 to 10 tablespoons of it. Just gradually add and taste to achieve your liking, and then adjust with salt. If you have extra, keep it refrigerated for up to a few days.

Step on the dough once again in between the two sheets of plastic, and form into a circle. Use your weight to stretch the dough as wide as possible, making it easier to stretch farther later. Flour the cornstarch on the working table and transfer the dough. Using a rolling pin, stretch the dough to about a 27-inch circle. Try to make the dough evenly thick. You can either form it into a circle or square. If you make the dough into a square shape, all the noodles become the same length when you cut them. Alternatively, if you find the dough too tough to stretch with a rolling pin, you can use a pasta attachment on a stand mixer to stretch it. Make the dough into about ¼ inch thickness.

Scatter the cornstarch on the dough surface and fold in thirds; just like you fold a letter to fit in an envelope, pull an edge from one side to the centre and another from the other edge to the centre, overlapping. Cut into ¼ inch thickness with a sharp knife. The key is to match the width of the noodle with the thickness of the dough to make nice shapes. As you cut, fluff the noodles to prevent them from sticking to each other. If you don’t want to cook all the noodles, you can divide them into smaller portions and freeze in airtight bags (remove the air as much as possible so as to avoid freezer burn). Consume within 2 months for the best flavour.

Boil water in a large pot. You need about 5 L of water to cook 400g of noodles per 3 people. Cook the noodles until done, for 12 to 13 minutes. The thicker the longer it takes to cook, so if you are not sure about the doneness, cut a piece of cooked noodle and see if the centre part became translucent. Adjust the heat accordingly to avoid spilling the hot water.

Drain the noodles and rinse with cold water. Drain completely and serve a portion in each bowl. Pour the hot soup over the noodles and top with green onions.

“Itadakimasu.”


Matcha, spring’s lushness

matcha_latte

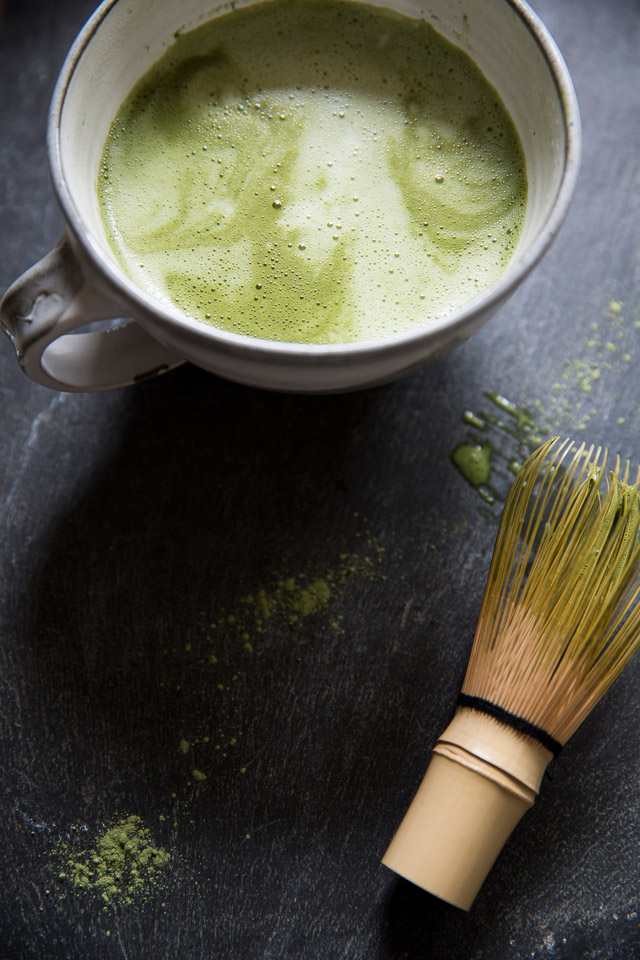
After the Pineapple Express had drenched its way along the Pacific coast last week, my yellow and purple crocuses along with irises and snowdrops woke up to the intense sun in the balmy air of (almost) spring. To some extent, matcha has the same effect on me. The lush, bright green colour and its intrinsic greenish taste awaken all my senses. As I promised last week, I sorted through a few matcha influenced recipes as a counterpoint to the coffee features that I posted previously. I’m also introducing complimentary ingredients/ nibbles that will greatly enhance these matcha delights. On that note, it may be a good idea to purchase a packet of good quality matcha and a bamboo whisk for your kitchen this spring.

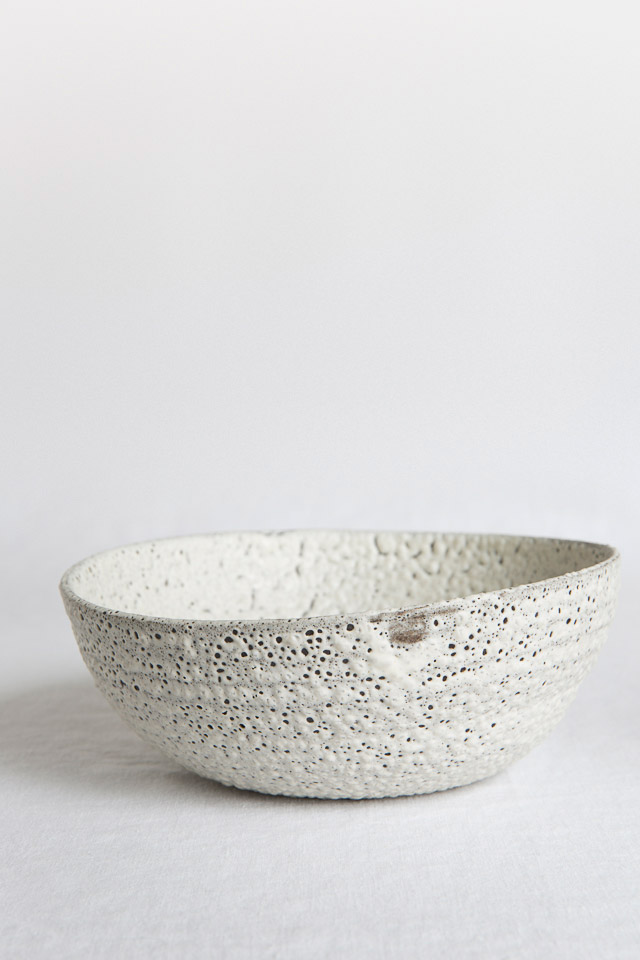
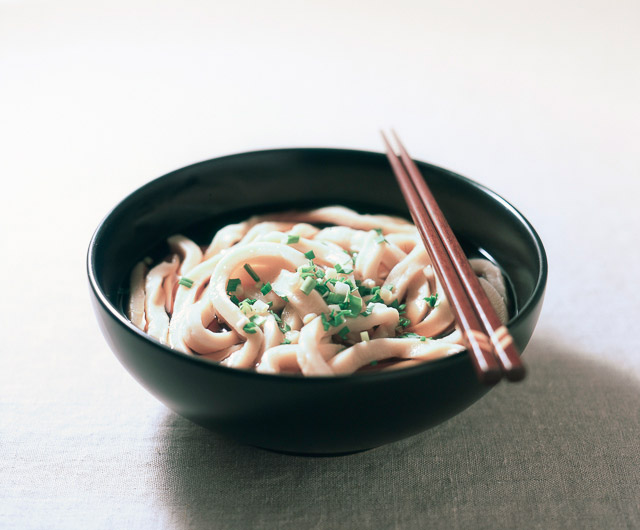
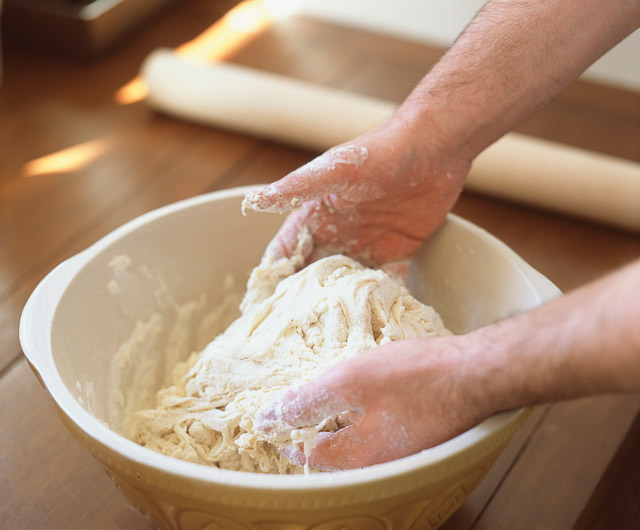
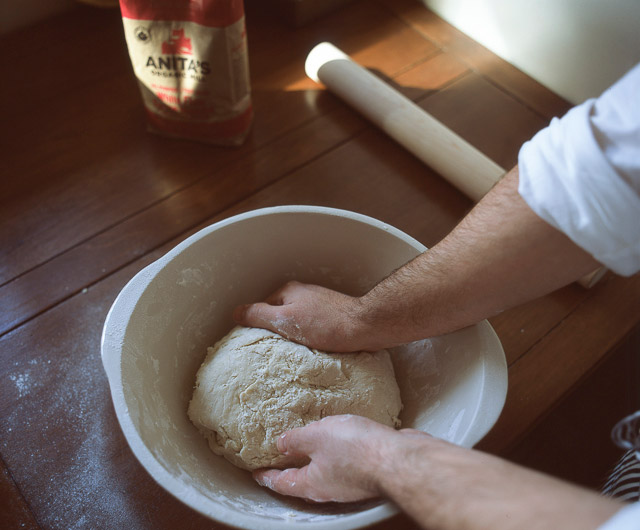
For those who are as mesmerized as I am by the beautiful pottery from the last four photos here, I’m happy to share that they are created by Janaki Larsen, a ceramic artist in Vancouver. I picked them up at Le Marché St. George, which she also co-owns. A great artistic café/ grocery containing specialty foods and other goodies!

matcha latte and toast with Azuki bean paste

Matcha Latte

Just for you

1 cup almond milk, soy milk, rice milk or cow’s milk

1 to 1 ¼ teaspoons matcha powder

Hot water

Sugar *optional

Pour hot water in a wide-mouth cup to keep warm. In a small saucepan, heat the milk over medium heat until small bubbles appear along the edge of the pan, for about 5 minutes. Do not boil!

Discard the hot water from the cup, and add the matcha powder. Add about 1 to 2 tablespoons hot water and whisk intensely until foamy, making sure there are no beads of powder left. Add the warmed milk and serve. Taste it first and adjust with sugar. I like it without sugar when I make the latte with cow’s whole milk, which renders enough sweetness so I can taste the lushness of the matcha flavours.


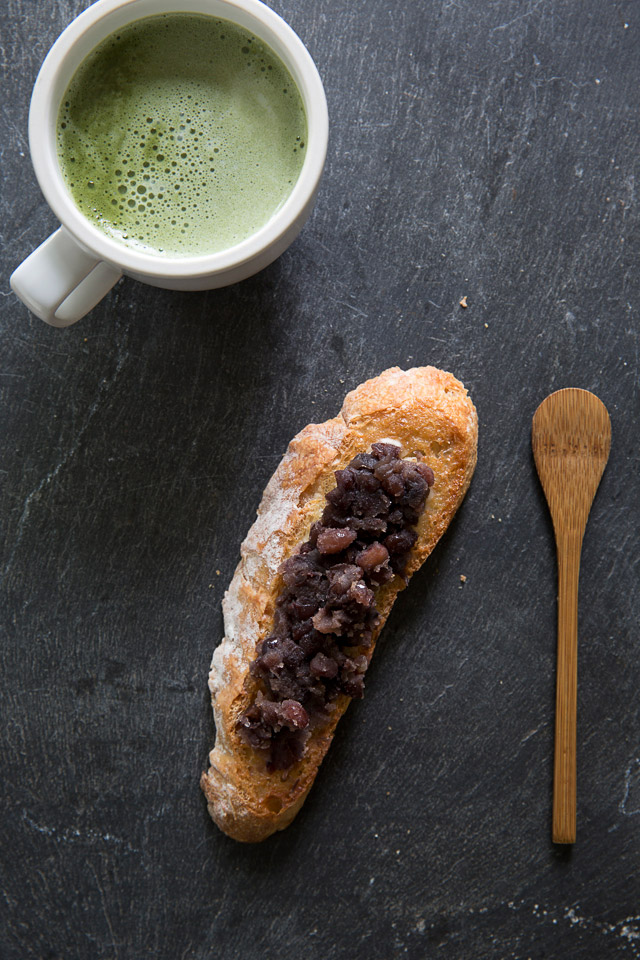
Sweet Azuki Bean Paste with Toast

As I grew up, I came to learn that my father’s all time favourite breakfast was buttered toast with smeared sweet Azuki bean paste. I wasn’t fond of the coarse texture of Azuki as a child; however, as my palate has matured, I have slowly grown into it and now it’s also my favourite thing to wake up to in the morning.

Makes about 2 cups

200g Azuki beans

160g sugar

½ teaspoon salt

You do not need to soak the Azuki beans prior to cooking. Rinse the beans and discard any deficient or diseased ones. Place the beans in a large pot with plenty of water and bring to a boil.

Drain the beans and discard the cooking water. Repeat this process one more time.

Next, place the beans in a pot with a plenty of water and bring to a boil, then continue to cook until the beans become soft, about 40 to 50 minutes. Add water as necessary to keep the beans covered.

Drain the beans and discard the cooking water. Add the sugar, salt and 1 cup water and cook over medium low heat until all the ingredients are well combined. For serving with toast, I cook for about 20 to 25 minutes until the paste becomes a thick mass. For serving as sauce, I cook for about 10 to 15 minutes, keeping it runny. Keep in mind that as the beans cool down, the sugar solidifies and the mixture becomes hard. So, don’t cook down too much if you intend to pour over the below chiffon cake.

Serve at room temperature. If you have extras, keep refrigerated up to 1 week. The paste also freezes well for about 1 month.


matcha powder

chasen

matcha_jelly

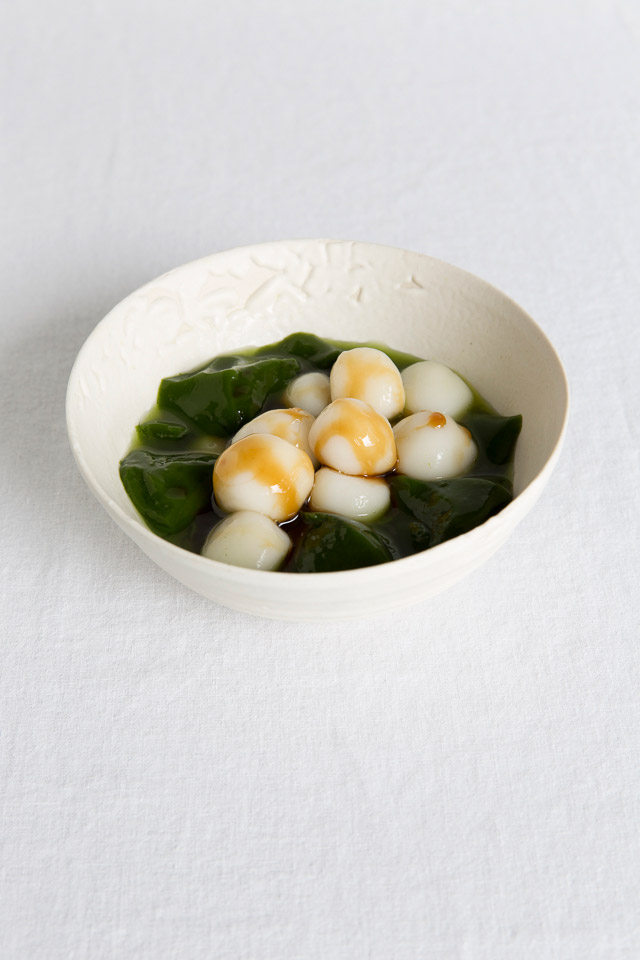
Matcha Jelly and Shiratama with Kuromitsu

Years ago, when I visited the Byodoin temple in Uji, Kyoto, I came across a 150 year old tea company where they also serve a variety of matcha products. I did not visit the area in the recent trip to Japan since the Byodoin was under construction, but I was able to purchase their famous matcha jelly at a souvenir kiosk in Kyoto station. Later I learned that they actually have a café in a department store right next to the station, so if you are near, it would be a nice place to take a break while waiting for a bullet train. All of their products seem wonderful but I particularly fell in love with their matcha jelly so I created this recipe according to my palate’s memory. Until you and I can get our hands on their version of jelly, this recipe may satisfy our desire.

Serves 2

300 ml freshly steeped green tea (from loose tea leaves)

1 g agar powder (I like the Japanese brand called Kanten Papa, sourced from a local Japanese grocery store)

2 ½ tablespoons sugar

2 teaspoons matcha

4 tablespoons hot water

Place the matcha and 4 tablespoons of hot water in a wide-mouth cup, and whisk intensely with a bamboo whisk until foamy, making sure there are no beads left.

In a large bowl, strain the freshly steeped green tea (making sure it’s over 80C) and agar powder, and stir well to combine.

Add the sugar and matcha paste, and mix well. Transfer to a medium bowl and refrigerate until solidified.

Scoop into serving bowls, and serve cold with shiratama and kuromitsu (recipe follows).


Shiratama and Kuromitsu

(It literally means white balls and black syrup)

Shiratama is typically served in Azuki bean soup as a warm dessert dish, and with the Azuki bean paste and vanilla ice cream together as a cold confectionary. Here, I introduced a refreshing take on the original, served with the above jelly drizzled with kuromitsu.

Serves 2

100g shiratama-ko (glutinous rice flour, available at a Japanese grocery store)

90ml to 100ml lukewarm water

3 tablespoons Okinawa black sugar (or Muscovado sugar or dark brown sugar)

3 tablespoons water

Bring plenty of water to a boil in a medium saucepan.

Combine the shiratama-ko and water in a medium bowl until the texture of an earlobe is achieved. Tear and form into 2/3 inch balls.

Place the balls into the boiling water. When the balls start rising to the surface, continue to cook for 3 more minutes. Dunk into ice water, let cool and drain well.

Make kuromitsu. Combine the sugar and water in a saucepan over medium heat, and stir consistently until the sugar is dissolved and becomes thick and syrupy in consistency.

Serve shiratama with the above matcha jelly and drizzle with kuromitsu.


matcha_salt

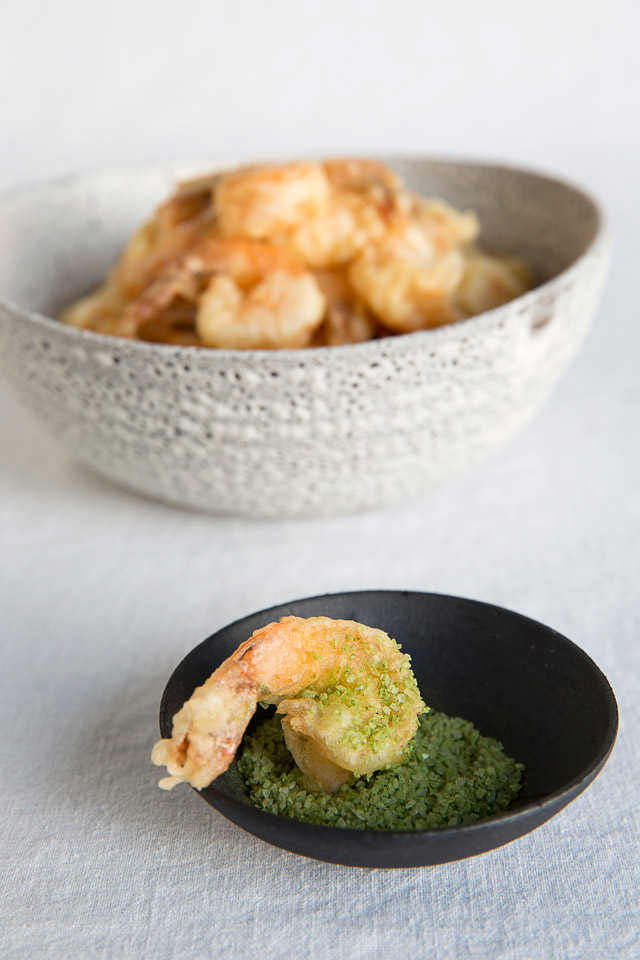
Prawn Tempura and Matcha Salt

I also included this savoury appetizer dish to help highlight matcha’s unique flavour. Instead of prawn, you can use fish, like halibut or cod, if you like.

Serves 4

1 lb prawns

1 egg

1 cup all purpose flour

1 cup ice water

Vegetable oil for deep-frying

¼ teaspoon matcha

1 teaspoon coarse or fine sea salt

Prepare the prawns. Rinse them first and remove shells, leaving the tail on. Cut off the sharp tips of the tails with a knife and then pat dry.

Heat plenty of oil to 350F in a wok or deep-rimmed pan. If you don’t have a thermometer to check the temperature, the rule of thumb is that the oil is ready when a dropped piece of batter should quickly sink mid way into the oil and then quickly come back to the surface and float.

Combine the egg, flour and ice water very lightly in a large bowl (a few strokes with a pair of chopsticks is good enough, and it’s okay that you can still see powdery flour). Do not stir too much as you will create a glutinous, and thus heavy, batter.

Quickly dip the prawns in the batter, remove excess and deep-fry them in the prepared oil until golden.

Rest the prawns on a paper towel to remove excess oil. Serve with combined matcha and salt.
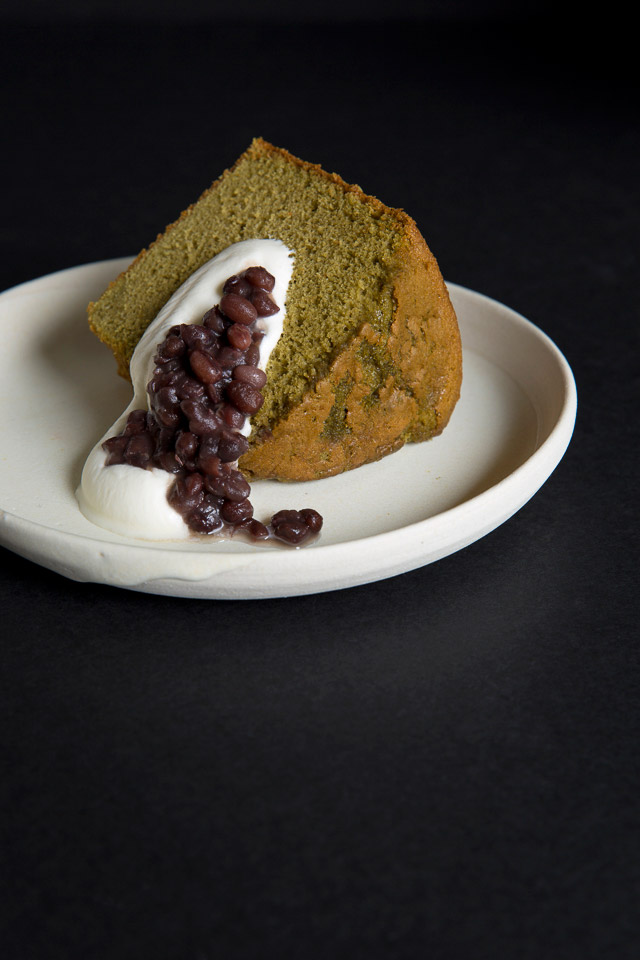
 

matcha chiffon cake

Matcha Chiffon Cake

Use 9 ¼ inch diameter x 4 inch high Angel food cake pan

2 ¼ cups all purpose flour

1 ½ cups granulated sugar, divided

2 ¼ teaspoons baking powder

¾ teaspoon salt

½ cup grape seed oil

7 large egg yolks

9 large egg whites

2/3 cup whole milk

4 tablespoons matcha

4 tablespoons hot water

Toppings

1 ½ cups Azuki bean sauce (see Sweet Azuki Bean Paste)

1 cup whipping cream

2 tablespoons sugar

Preheat the oven to 325F. Whisk together the flour, 3/4 cup granulated sugar, baking powder, and salt in a large bowl.

Whisk the matcha and hot water intensely in a small bowl with a bamboo whisk until it becomes paste-like, making sure there are no beads left.

Whisk together oil, egg yolks, and milk in a large bowl. Add the matcha paste into the egg yolk mixture and stir to combine. Whisk flour mixture into egg yolk mixture.

In the bowl of a stand mixer, beat the egg whites until soft peaks form on high speed. Add the remaining ¾ cup sugar in 3 installments. Continue to beat until a stiff glossy peak forms. *If you have a problem, such as that your egg whites won’t solidify, try to cool the bowl by placing ice packs around it.

Whisk 1/3 of the egg white mixture gently into the batter, and then fold in the rest of the egg white mixture with a rubber spatula.

Transfer the batter into a cake pan. Bake until the top of the cake springs back when touched, for about 55 to 57 minutes. Let cool upside down for about 1½ hours.

Release the cake by running a knife around the edge of the tube and the side of the pan. Transfer to a cake stand or a large flat plate.

Beat the whipping cream with sugar to a desired consistency.

Slice into individual portions, and serve with a dollop of whipping cream. Spoon the Azuki bean sauce over top.

Adapted from MarthaStewart.com


bowl by Janaki Larsen