Sushi with Tropical Flair

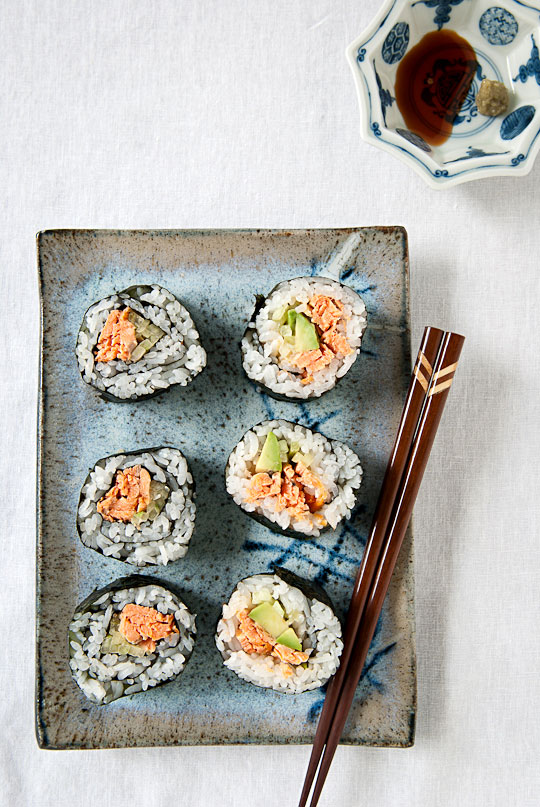
Spicy avocado sushi with tropical flair

I’m always searching for inspiration. It could be in the garden or, sometimes, in historic parts of Vancouver. New experience always feeds one’s creativity and imagination, which may eventually take form some day. So I love the balance of being in nature and core parts of the city, especially where historic areas meet modern urbanism!

Carrall Street, GastownGastown

If you are looking for inspiration for a night out on Friday, this may be the spot for your next visit to Vancouver! Take a stroll on cobbled alleys in the old Victorian architectural section of the city. The streets are filled with antique stores,  boutiques with fine home furnishings, clothing stores with locally/globally designed items, a store with vintage kitchen products, a contemporary home interior furniture store, and a shoe store with a wide range of heels and boots. This is Gastown! Dine on freshly made Margherita pizza in the wood fired oven accompanied by a refreshing Pomegranate Passion cocktail at Nicli Antica Pizzeria. Oh, and don’t miss the chocolate ganache and banana slices with a caramelized crispy topping for dessert!

pizzeria and its neighbourhoodWater Street, Gastown

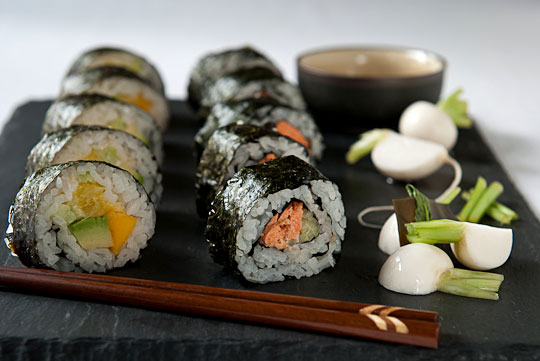
For some post meal browsing, navigate the neighbourhood maze to the Fairmont Pacific Rim Hotel along the water where you can enjoy  the live music! It has a beautiful white marble floor and decorative fireplace occupied with tiny tables for you and your company to indulge in a glass of Grand Marnier or Little Bird, the latter of which has a hint of sweet rhubarb aroma. Dance with the band sound in the dimly lit interior or simply appreciate the gorgeous and sophisticated atmosphere. If you are still hungry, try their spicy avocado sushi with a surprisingly refreshing twist plus a pot of green tea to relax you for the rest of the night.

Japanese teapot at Fairmont Pacific Rim broiled salmon sushiturnipsturnip picklessushi plattersushi platter

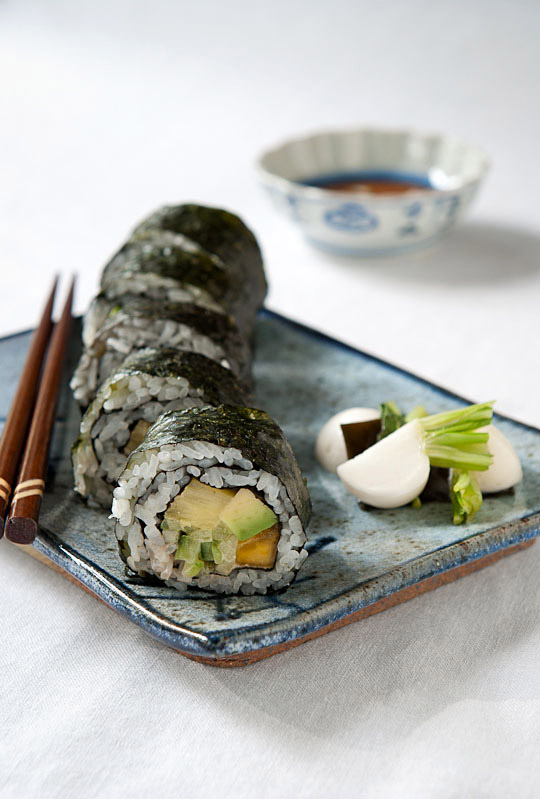
Sushi with Tropical Flair

You can use short grain brown rice or half and half for this recipe. Sushi with brown rice is a little bit tricky to make due to a lack of starch content (less sticky). If you are making nigiri, it’s not a bad idea to let the cooked brown rice rest in a refrigerator overnight and microwave it when needed (although I’m not a big fan of microwaves), but for this recipe freshly made will suffice. Just make sure to add more water if using only brown rice though.

Enough for 4

2 slightly rounded cups of Japanese white rice

4 cups water

A piece of kombu, cleaned with a wet towel

4-5 tablespoons Japanese vinegar

4-5 tablespoons cane sugar

2 teaspoons sea salt

1 pack nori (one sushi roll uses 2 sheets of nori so have about 10 sheets)

Soy sauce

Wasabi paste

Ginger pickles or homemade turnip pickles (recipe follows below)

Toppings

½ pineapple, peeled, core removed, and cut into ½ inch strips

½ papaya, peeled, seeded and cut into ½ inch strips

1 avocado, peeled, seed removed and cut into ½ inch strips

1 cup cucumber, peeled and julienned

1 small piece broiled salmon

½ cup mayonnaise

1 tablespoon hot sauce or chilli sauce, or more to your taste

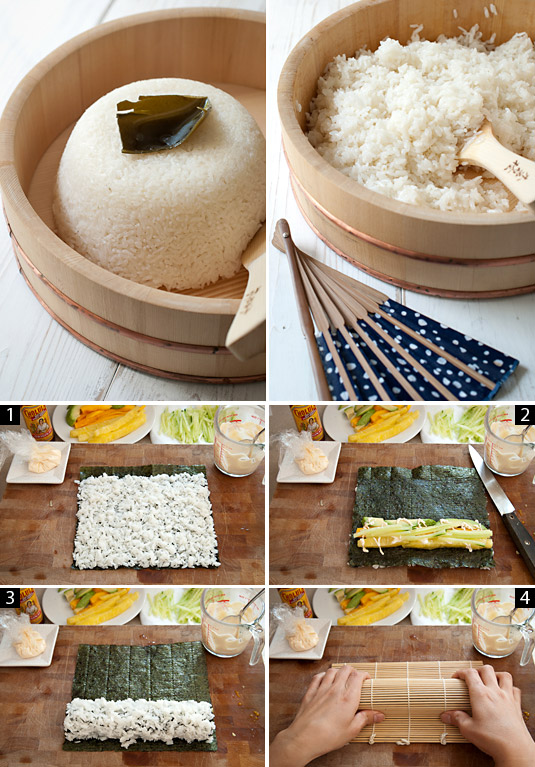
Wash and rinse the rice until water becomes transparent. Place the rice, water and kombu on top in the bowl of a rice cooker or a large pot and cook. Rice will be on the harder side, but this is the way it should be.

Meanwhile, make a vinegar mixture by combining all the ingredients in a small saucepan over medium heat until sugar dissolves and bubbles are visible on the edge of the pan. Let cool.

Prepare the toppings. Make spicy mayonnaise by combining the mayonnaise and the hot sauce. I used Cholula hot sauce, and didn’t mind the taste but Sriracha seems commonly used. Use a small piece of saran wrap with a tiny hole for piping the mayo. Set aside a bowl of cold water to wet your hands, a makisu to form sushi rolls, a wet towel, and of course, a well sharpened knife to cut the sushi.

sushi making process

Flip the rice in a handai (flat-bottomed wooden tub), or large bowl. Here, you need to be multi-tasking. Drizzle the vinegar mixture on the rice and, using a wooden spatula, quickly but gently mix the rice by making cutting motions with your right hand and fanning with the other hand. I’m ambidextrous, so this works for me. If this seems too complicated, you can use an electric fan like my grandma does . The key is to let the rice soak the vinegar and cool before it becomes sticky so that you can achieve the desired shiny texture. Because no matter what filling you have inside, sushi is all about the rice texture!

Now the show begins! Place everything close to you; the rice, nori, toppings, the mayo, the bowl of cold water, the wet towel and the makisu. Wash your hands and place one of the nori sheets on a clean work surface. Wet your hands with the bowl of water and remove excess moisture by tapping both hands against each other to prevent the rice from sticking to your fingers.

1) Grab about 3 extra large egg size portions of rice and spread on the nori using your fingertips. Fill the empty space, especially the edges, leaving a half an inch strip at the top. Be sure that it’s not too thick, but just covers the surface of the nori.

2) Flip the nori from the side (now the rice is facing down). Make sure the working surface is moistened with the wet towel so that the flipped rice doesn’t stick to the surface.

Place the toppings on the nori: the pineapples, papaya, cucumber and plenty of the mayo mixture. PLENTY! Roll from your side on foreword by tucking and tightening the toppings as you roll. This is a critical step towards making beautiful and easy-to-eat sushi that doesn’t fall apart. Once rolled, there is no turning back to make the roll tight!

3) Place another sheet of nori on the work surface shiny side down, and place the rolled sushi on top closer to you. Then roll the whole thing.

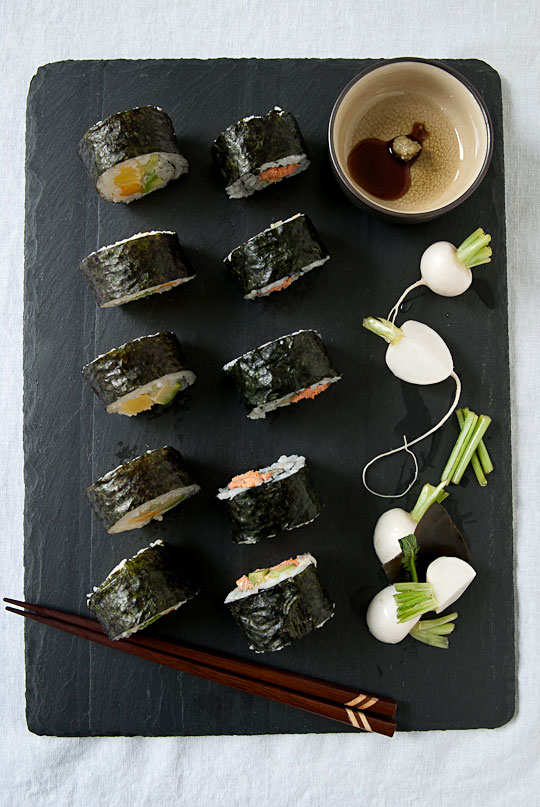
4) Lay the makisu on the rolled sushi and gently press to form into a square shape. This is optional, but I feel that this forms and tightens the sushi nicely. Repeat with the rest with your choice of combinations; broiled salmon with cucumber etc.

Cut the sushi rolls into ¾ inch pieces or your preferred thickness by moving the knife back and forth gingerly. It is easy if you wipe the knife with the wet towel each time you cut.

Serve immediately with the soy sauce, wasabi and the pickles. Follow with a pot of green tea.

*An inspiration from Fairmont Pacific Rim


Homemade Turnip Pickles

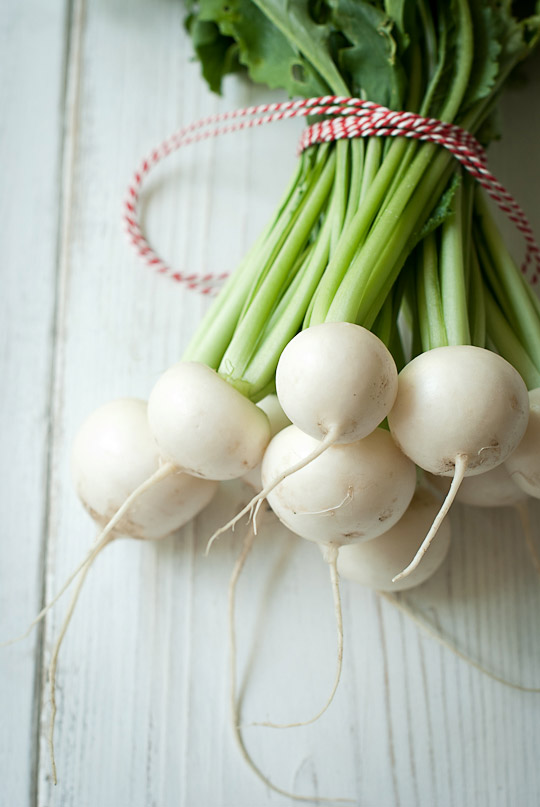
I can almost say that I grow turnips just for this single recipe. You want to use the freshest turnips you have on hand for these pickles, as the tender and sweet flesh makes them divine. Grow your own or go to the farmer’s market!

Makes 1 small jar

A bunch of turnips (about 10 pieces)

A piece of kombu, cleaned with a wet towel

200 ml Japanese vinegar or white vinegar

3 tablespoons cane sugar

1 ½ teaspoons salt

Wash the turnips, remove any diseased parts, and cut off the tops leaving little stubs. Cut stems into 1 inch pieces. If the turnips are large, cut in half or quarter lengthwise.

Place the vinegar, sugar and salt in a small saucepan and boil over medium heat until the sugar dissolves.

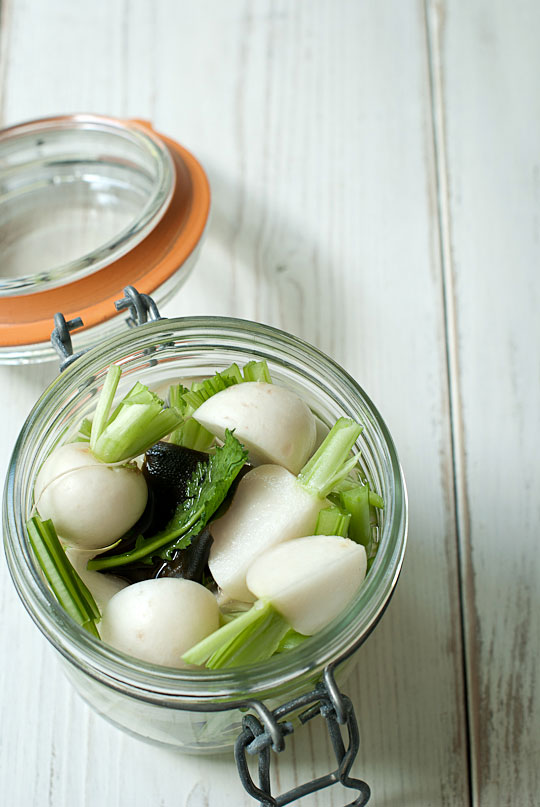
Fill a sterilized airtight container with the turnips, some stems, kombu and the vinegar mixture. Let cool and store in the refrigerator for at least 3 to 4 hours or over night. Keeps in the refrigerator for a while (not for us!).

 

Green Week

spicy spot prawns with tah tsai

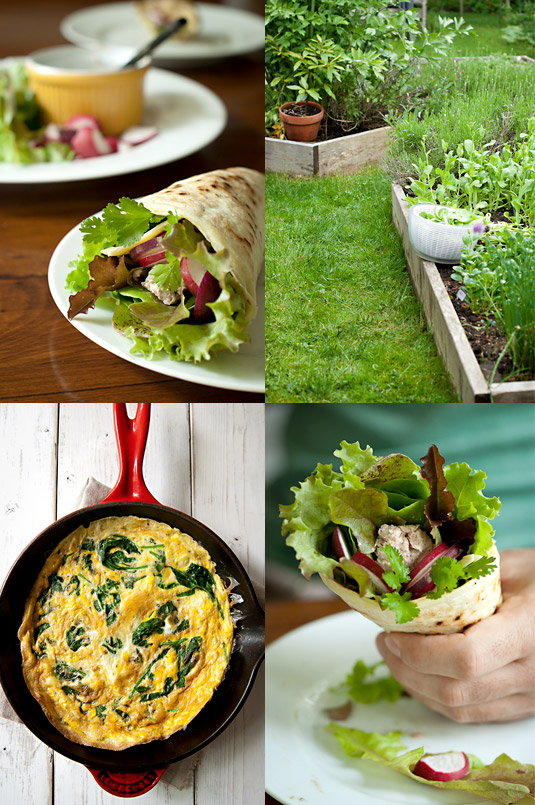
It seems as if we have been making up for the wintertime when the greens were scarce but tons of sprouts and stored vegetable dishes were on the table, because we have been devouring the greens: spinach frittata, spinach goma ae, salad with arugula, mizuna, various forms of lettuces and mustard greens, bok choy, and tah tsai for stir-fries. In other words, this is an opportunity to tuck these tender leaves in any recipes I encounter. After two weeks of hard rain (and the rain continues), these greens from my garden are more abundant than those that line the shelves at a grocery store, the difference being that mine are the freshest, tastiest organically grown produce around and haven’t traveled long distance to feed us.

fish pate crepe, the garden and spinach frittata

This rain also brought us back to the life of a fireplace and warm food inside the house. Simply put, Mother Nature decides for us as to what to cook, and I personally like this seasonal way of eating. As my gardener friend states, “the bright side of having so much rain is that we don’t need to spend time watering vegetables.” It is true that I don’t have to worry if there is enough water in the soil so my greens stay crisp and sweet; a seasoned gardener always knows best. Looking out through the windows, it is obvious what we will eat for lunch today; grilled cheese sandwiches with a kick of mustardy flavour from mizuna leaves in between the bread.

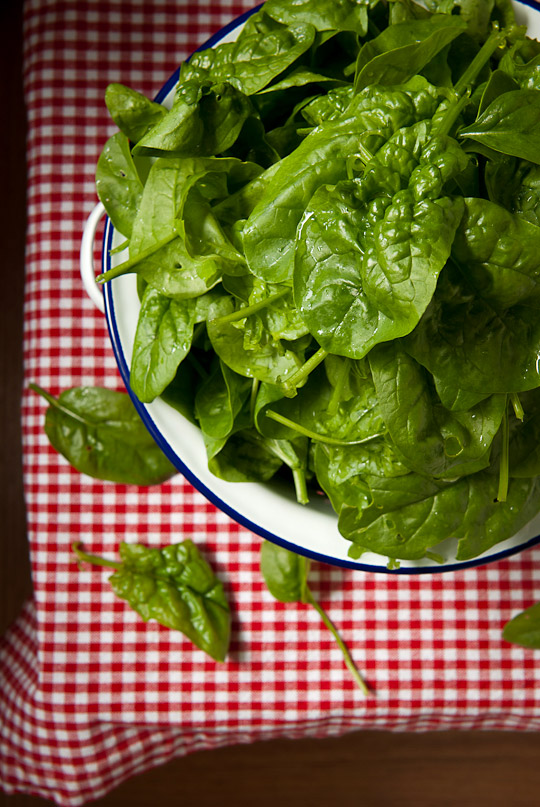
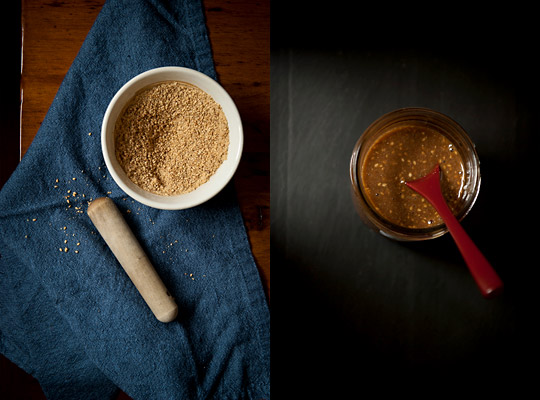
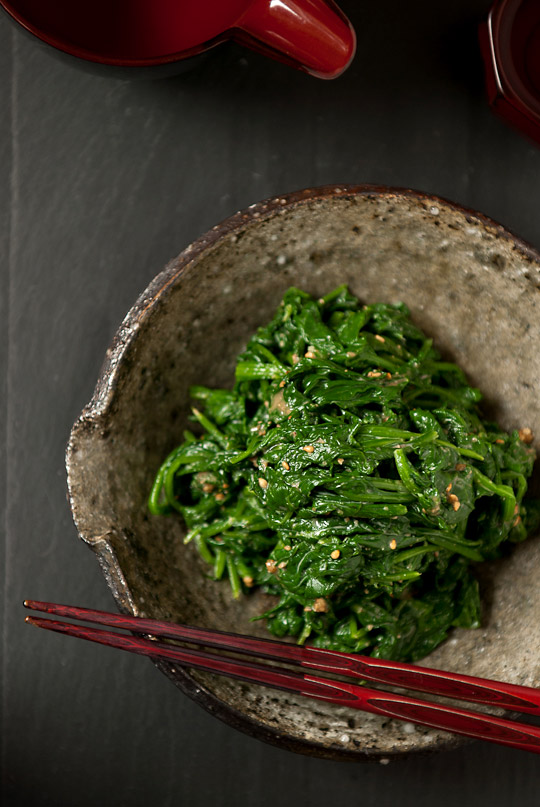
Bloomsdale Savoy and Tyee spinach from the gardengoma ae saucegoma ae

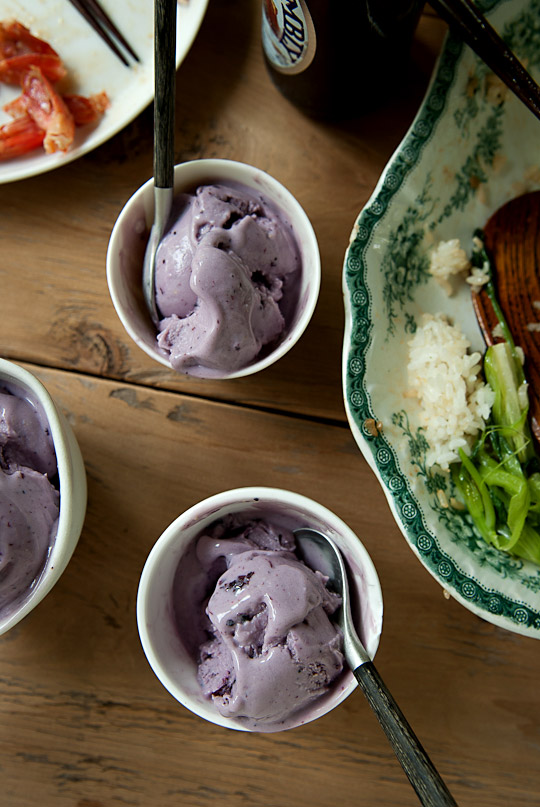
It’s impossible to ignore the army of greens standing up strongly, trying to reach the sky, and frankly it is overwhelming. So I call this week’s post “Green Week.” For some reason, I feel that now is also a good time to go meatless. Of course one cannot skip dessert, so I made a lighter version of a special treat that I feel somehow corresponds with the green theme. It’s French vanilla blueberry frozen yogurt. However, if you are prepared to eat heavier ice cream, here is the recipe.

French vanilla and blueberry frozen yogurt

But first things first. Let’s start with some delicious and nutritious dishes you can make using this wealth of greens before I go on to tempt your sweet tooth with the frozen yogurt recipe!

spicy spot prawns with tah tsai

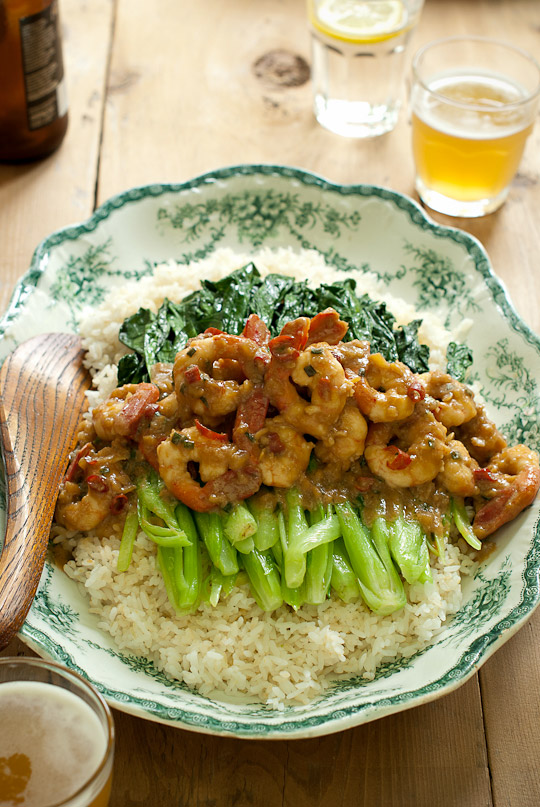
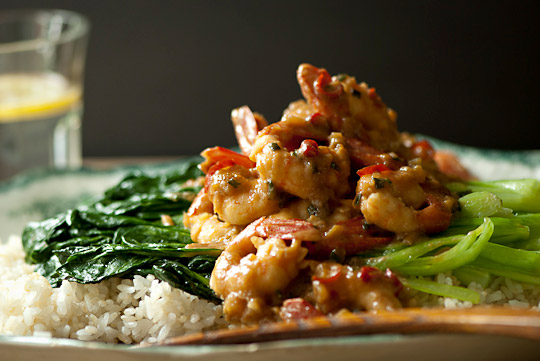
Spicy Spot Prawns with Tah Tsai

I cook this recipe all year around with tofu and any greens available, say with kale in winter, tah tsai or bok choy in spring and green beans in summer. Of course I used spot prawns to celebrate its season and that allows me to achieve the maximum flavour this recipe can ever get. Make sure you have a lot of greens on hand because they cook down to NOTHING!

Serves 3-4

2 garlic cloves, finely chopped

A knob of ginger, finely chopped

1 tablespoon scallions or green onion, chopped

2-3 red chili peppers, seeds removed, sliced thinly

20 spot prawns, head and shells removed (or 1 lb silken-firm tofu)

3 big bundles of tah tsai (or more), cut in half or ¼ lengthwise

4 tablespoons vegetable oil

1 tablespoon sesame oil

1 tablespoon cane sugar or brown sugar

2 tablespoons Chinese chili bean sauce, or Japanese miso for a non spicy version

3 tablespoons soy sauce

2 tablespoons sake, white wine, beer or water

1 tablespoon cornstarch

1 tablespoon water

Salt and pepper

3 cups cooked rice of your choice

Remove heads and shells of the spot prawns, then rinse and pat dry.

Heat 2 tablespoons of the vegetable oil and the sesame oil in a wok or large cast iron skillet, gradually add the garlic, ginger, scallions and red chili peppers, and cook over medium-high heat until lightly coloured and aromatic. Add the sugar, Chinese chili bean sauce, soy sauce, and the sake, and bring to a boil. Add the prawns and cook until heated. In the meantime, mix the cornstarch and the water in a small bowl. When the prawns turn whitish and are cooked through, add the cornstarch mixture, stir well and simmer for a couple of minutes to achieve the thick sauce consistency. Transfer to a plate and set aside.

Wipe the wok or skillet to remove any sauce left. Heat it with the remaining oil swirling around the side. When the oil is smoking hot, add the tah tsai and stir-fry constantly stirring on high heat. The key is to cook the vegetables on high heat for a very short time so as not to make them watery; they should still have a firm texture and bite to them. Season with salt and pepper.

Serve cooked rice on a big platter and arrange the tah tsai on top, then pour the prawn mixture on top.


Spinach Goma Ae

Serves 2

1 lb spinach, washed

1 tablespoon goma ae sauce (see below recipe)

Boil water in a wide pot with enough water to cover the spinach. Cook the spinach (it only takes a matter of a second or so). Turn the leaves upside down to ensure that the leaves on top are also cooked. Drain into a colander and soak in a medium sized bowl with cold running water to stop further colouring. Continue until fully cooled. Give a gentle squeeze to remove the excess moisture. Cut into 1 inch chunks. Discard the water.

Place the goma ae sauce with a little bit of water back in the bowl. Stir well until emulsified and somewhat liquidy. Toss the spinach in the sauce and stir gently to combine well. Serve immediately.


Goma Ae Sauce

This is a multi-purpose sauce for a variety of foods that I always keep on hand. You can turn any greens into a quick nutritional appetizer. Stir into cooked and chopped asparagus with red chili pepper, pour over julienned cucumber with steamed chicken, mix into cooked noodle salad or make goma ae with cooked nettles. Indeed, this sauce is remarkably versatile, and lasts for a long time in the refrigerator (about 2 months or even longer).

Makes about 250ml jar

3 tablespoons cane sugar or brown sugar

3 tablespoons soy sauce

4 tablespoons toasted sesame seeds

4 tablespoons tahini

Grind the sesame seeds very well until there is no coarse texture, using a suri bachi with suri kogi (Japanese mortar and pestle).

Combine all the ingredients in a large bowl until well mixed. Transfer to a clean airtight container and store in the refrigerator.


French Vanilla Blueberry Frozen Yogurt

I made this dessert right after finishing the delicious spot prawn dish, as I was craving something cold and refreshing to my palate. It was totally on a whim, but having an ice cream maker container in the freezer enabled me to do so. And of course, I used some frozen blueberries saved from last year.

Makes about 3 cups

1 cup fresh or frozen blueberries

½ cup cane sugar

1 cup whole milk

½ cup cane sugar

4 egg yolks

1 cup full fat plain yogurt

1 ½ teaspoons good quality vanilla extract

Place the blueberries and the sugar in a small saucepan over medium high heat and cook until the berries lose their texture and the sugar is well combined. Let cool.

Place the milk and sugar in a small saucepan, then heat just until bubbles appear around the edge of the pan. Gradually whisk into egg yolks, then return the egg yolk mixture to the saucepan. Cook until steaming and thickened enough to coat a spoon. Remove from heat, strain into a bowl and stir consistently until cool. You can speed up the process by placing the bowl of strained egg mixture over a large bowl filled with ice cubes and cold water.

Add the yogurt and the vanilla extract. Stir well and refrigerate for at least 2 to 4 hours.

Churn the yogurt mixture according to manufacturer’s instructions. When the frozen yogurt is just about done, stir in the blueberry mixture and continue churning until your preferred texture is achieved.

Transfer the frozen yogurt to a separate container, cover and freeze for 1 to 2 hours.

Adapted from donvier’s French Vanilla Frozen Yogurt recipe.