Leek Barley Soup & Blueberry Cobbler

leek_barley_soup2

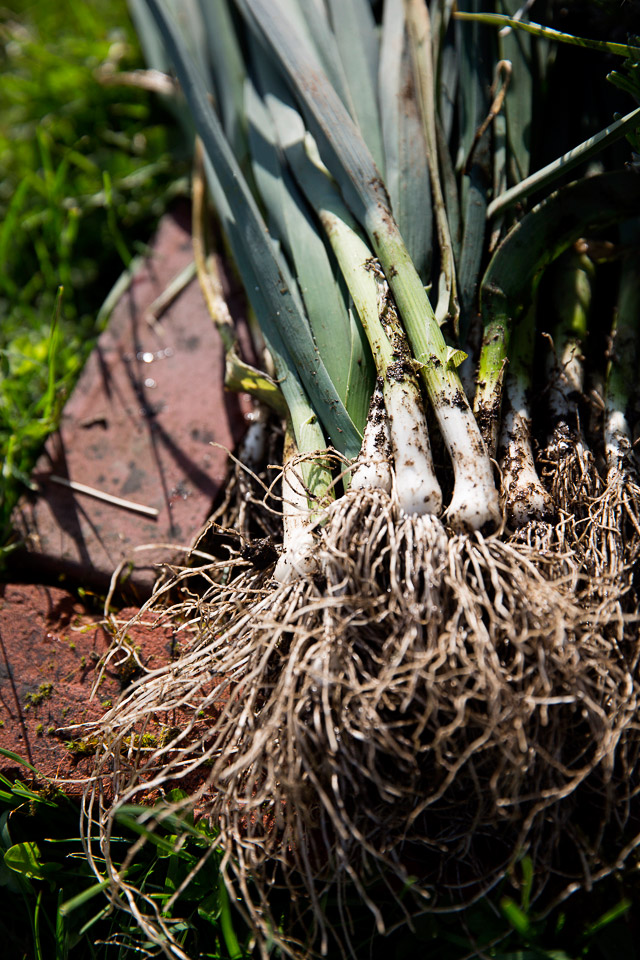
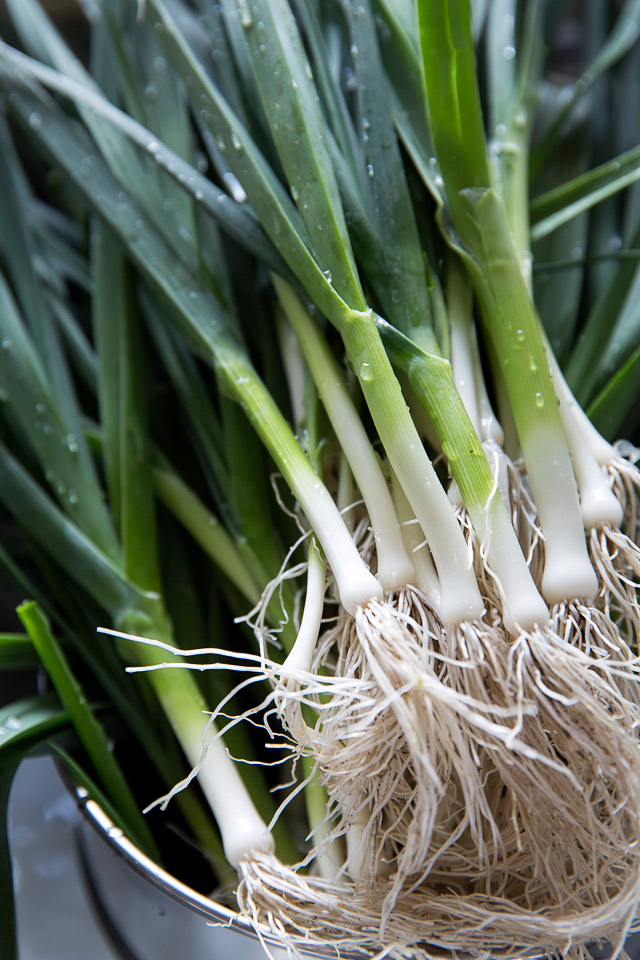
I enjoy the time when I lift remnants of the last year from the garden, in order to prepare the beds for a new cycle to come. Every year, I am reminded of some of the amazing and sometimes mysterious works of Mother Nature. Lots of hopes, failures, disappointments, frustrations, patience, joy, appreciation, peacefulness and simple happiness–I get these feelings through gardening. Yet all sensory experience really physically kicks chemicals in my brain when working with living plants. They are something so basic and organic yet fundamental in humans’ life in this ever changing world. It is indeed as if I am learning about life itself. This experience has become so much more than just gardening to me. And at the end of the day, I know that there is always a good meal to follow using what’s in season. In fact, it is most exciting to transform these bits and pieces into something hearty and tasty. I begin to feel a sense of triumphant satisfaction regardless of the type or amount of produce on hand, be it a huge bunch of leeks or a handful of cilantro leaves.

In this post, I’m excited to share this soup made with the leeks that just came from a few feet away as a result of my spring cleanup. It was such a reward to turn the last bits of the “onion family bed” into something easy, delicious and soothing. Plus, indoor cleanup created this cobbler dessert thanks to some of last year’s precious blueberries.

leek leek2blueberry_cobblerblueberriesblueberry_cobbler4

Leek Barley Soup

Serves 4

2 cups leek, sliced into ½ inch rounds

½ teaspoon ginger, finely minced

1 heaped tablespoon butter

4 cups chicken or vegetable stock

4 cups water

½ cup pot barley, washed and drained

Salt and freshly ground pepper

Chopped scallions for garnishing

Melt the butter in a large pot and sauté the leek and ginger until softened.

Add the chicken stock, water and barley and bring to a boil. Turn the heat down to medium low and simmer until the barley is soft, for about 40 minutes. Skim as necessary.

Adjust with salt and pepper and serve hot with scallions.
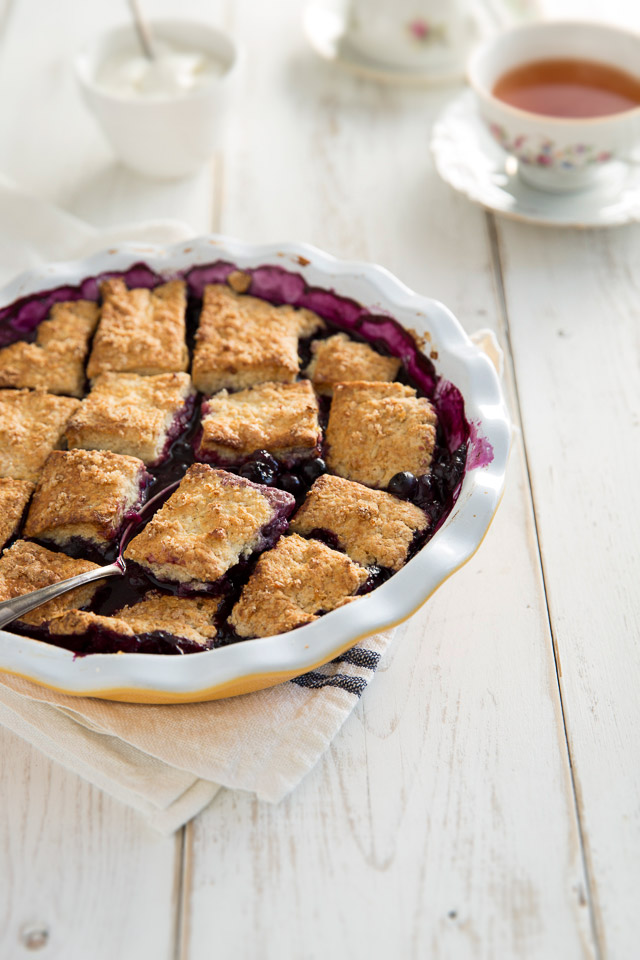
 

Blueberry Cobbler

Serves 6 to 8

Filling

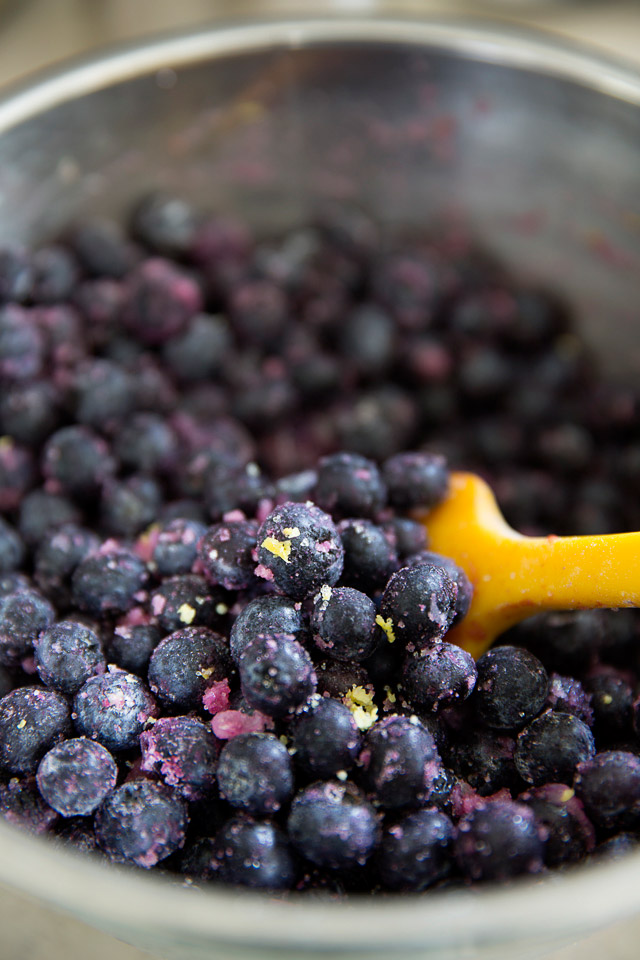
1 ½ lbs frozen blueberries, thawed

Lemon juice from ½ lemon

1 teaspoon lemon zest

3 tablespoons cane sugar

1 tablespoon flour

Crust

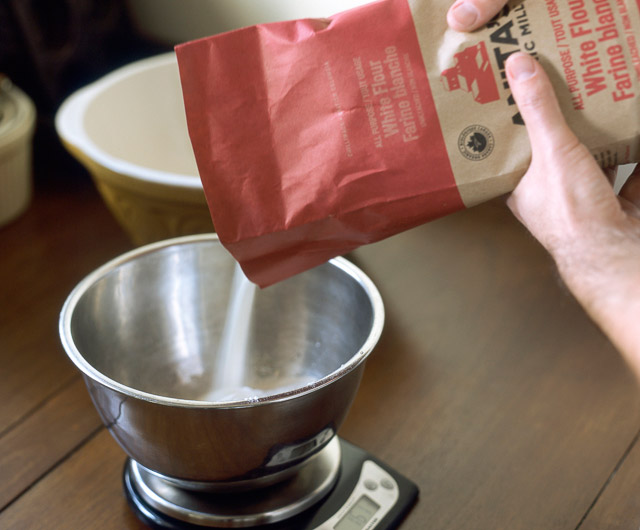
1 cup all purpose flour plus extra for dusting

½ cup rolled oats

¼ teaspoon salt

2 teaspoons baking powder

4 tablespoons cane sugar

1 teaspoon lemon zest

1/3 cup cold butter, chopped into pea sized cubes plus more for greasing

1/3 cup 10% fat plain yogurt

1 tablespoon milk for brushing

Sour cream (optional)

Mix the blueberries, lemon juice, zest, sugar and flour in a large bowl. Transfer the blueberry mixture to a greased 9 inch round baking dish or shallow dish similar in size.

Preheat the oven to 375F with a rack in the centre.

Thoroughly combine the flour, salt, baking powder, and 3 tablespoons cane sugar in a bowl. Combine the remaining 1 tablespoon cane sugar and lemon zest in a small bowl and set aside.

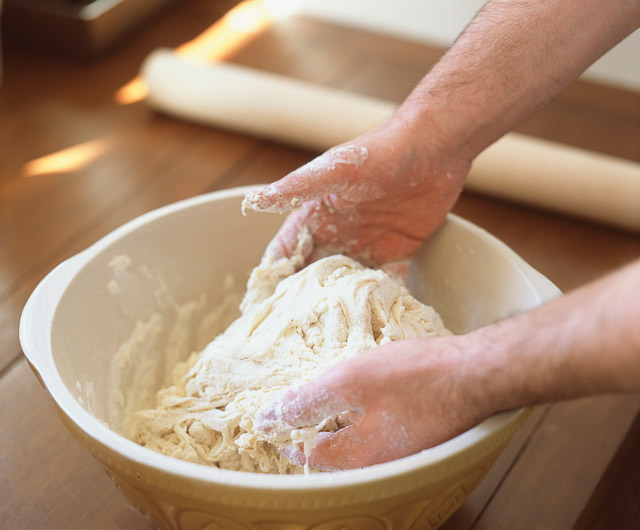
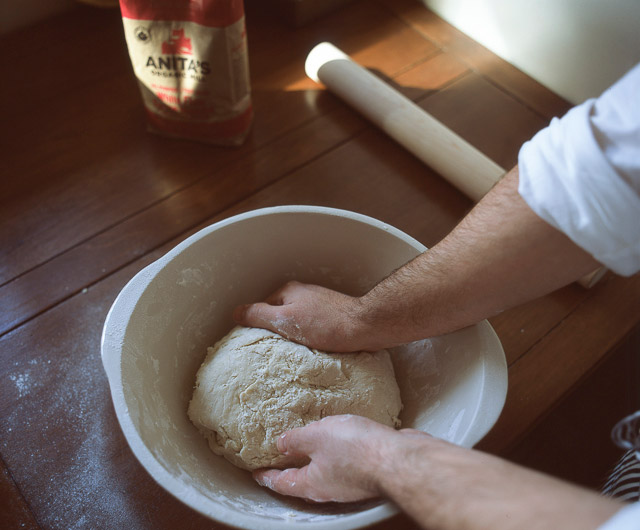
In a food processor, pulse the rolled oats until coarsely ground. Add the flour mixture and pulse a few times to blend. Add the butter and pulse until the dough becomes flaky. Then, add the yogurt and pulse until the dough comes off from the side of the bowl of the food processor and becomes a mass.

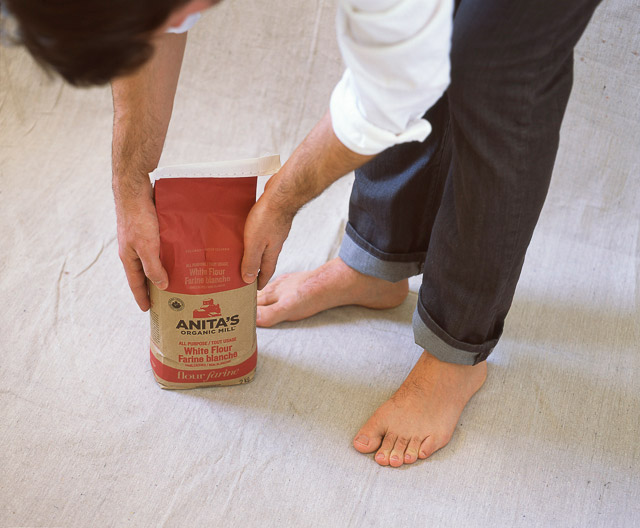
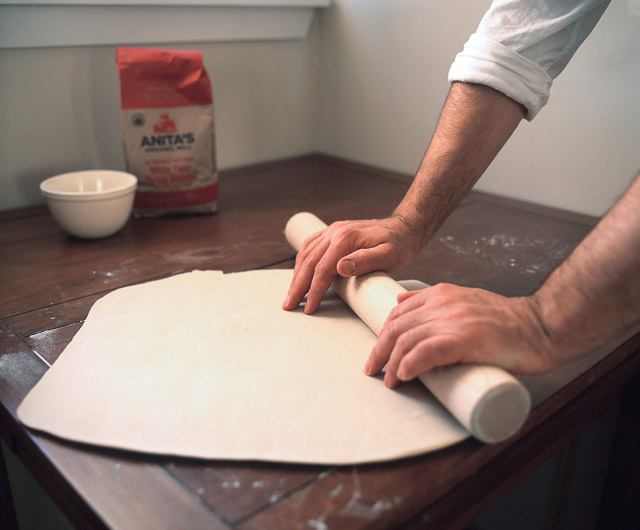
Dust the work surface with flour and knead the dough a few times, forming into a ball. Flatten the dough with a rolling pin into a 2/3 inch thick disk. Cut the dough into squares.

Place the squares on top of the blueberries. Brush the squares with milk and sprinkle with the lemon zest sugar mixture. Bake until cobbles become golden and juice becomes bubbly, for about 40 minutes.

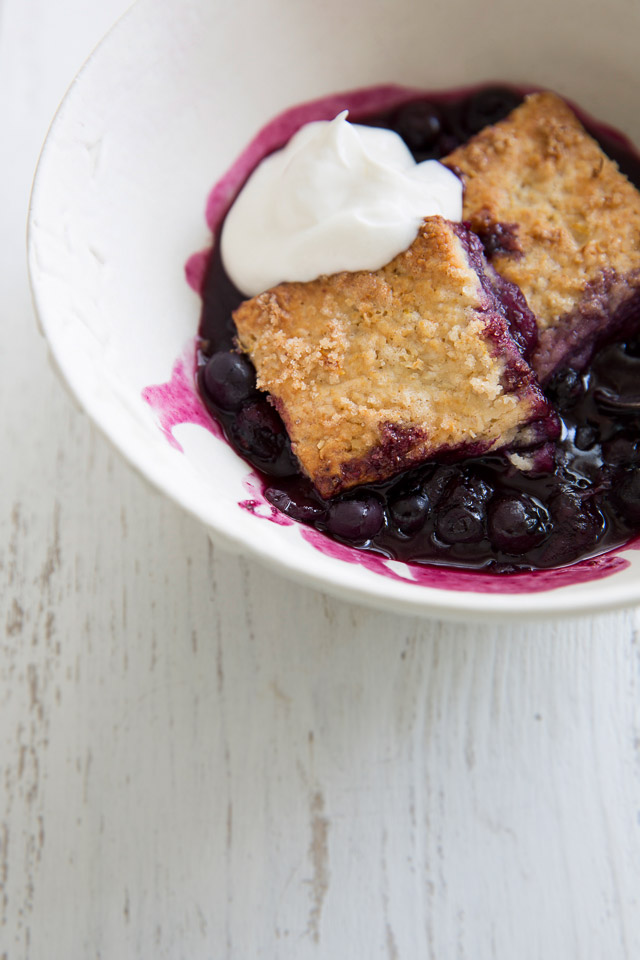
Serve warm with a dollop of sour cream.


Udon Noodles: Going Back To the Basics

udon_noodle

Lately, I have been enjoying doing old things. It seems like I’m against the current of modern technology of this day and age, but it just feels right in my own skin. Having started shooting using film is one of them. I truly enjoy the process of taking a photograph. Everything slows down. Unwrap a roll film. Load it and wind it on a spool, wind again to finally be able to shoot. It’s peaceful. Carefully choose a subject and think about a composition, so as not to waste one precious shot out of 10. Now decide on the aperture, take light metering and settle on the shutter speed. Concentrate. Focus. Duh, take off the darkslide, which I often forget to remove! Wait for the right moment. Press the shutter, hoping that neither my subject, nor I, have moved a mere inch. “Dung,” the heavy sound of mirror movement and shutter action completes all that it takes to photograph one scene, and that excites me very much. And yet, I won’t know if I managed to come away with the shot until the film is developed. I have become patient. Cock the shutter, advance the film and start all over again. I get indescribably giddy.

udon flour

So going back to the old things, for this post, I made udon noodles for you in the traditional way that some Japanese people still do. It is a time consuming process, but if you are looking for something to clear your mind or are trying to settle your anxiety, or if you are like me, just like to use your hands to make food, it is like a type of meditation. At least, the result is certainly worthy: a warm, utterly satisfying bowl of noodle soup.

flour

mixing

kneading

udon dough

rolling the dough

udon noodle

Udon Noodles and Soothing Soup

Feeds 8 – 10 people

1 kg all purpose flour

Salted water (50g salt and 450 g water)

Cornstarch for rolling the dough

Topping

Green onions, scallions or chives, finely sliced

Soup (serves 3-4)

2 x Kombu (about 4 x 4 inch pieces), make some slits in it with kitchen scissors

2 cups bonito flakes

5 tablespoons mirin

5 tablespoons light coloured soy sauce (usukuchi soy sauce)

or Soba sauce (see the recipe)

Sea salt

Dissolve salt well in 450g of water. Place the flour in a large bowl and add the salted water. Combine until there is no dry flour left. Form into a ball.

Place the dough in between two sheets of clean plastic sheets or Saranwrap on a sheet of clean cloth on the floor (yes, the floor!). Step on the dough with your clean feet. Fold it, step on it to stretch it and fold again. Repeat until the dough becomes smooth. Try not to let the air get inside the dough when you are folding. Match the corners neatly while folding so that it becomes a tidy small mass. Form into a ball.

Rest the dough in an airtight bag (or wrap tightly) at room temperature, 1 hour in summer time or 2 to 3 hours in winter.

In the meantime, make dashi stock. Wipe and clean the piece of kombu with a wrung wet cloth. Do not wash, as flavour leaches away.  Fill a large pot with 1.5 L of water and place the kombu inside. Let sit for 20 minutes to let umami leach into the water.

Warm up the pot over medium heat and, just before water starts boiling, remove the kombu from the pot. Don’t cook the kombu, as it gives off an unpleasant odor and taste.

Add the bonito flakes and bring to a boil very briefly: remove from heat. Do not boil the bonito, as it also makes the dashi unpleasant to taste. Leave the dashi until the bonito has sunk to the bottom of the pot and infused the stock. Strain the dashi stock into another pot. Warm up, and add mirin and soy sauce. Adjust with salt. Or, if you already have the soba sauce made, you can add 8 to 10 tablespoons of it. Just gradually add and taste to achieve your liking, and then adjust with salt. If you have extra, keep it refrigerated for up to a few days.

Step on the dough once again in between the two sheets of plastic, and form into a circle. Use your weight to stretch the dough as wide as possible, making it easier to stretch farther later. Flour the cornstarch on the working table and transfer the dough. Using a rolling pin, stretch the dough to about a 27-inch circle. Try to make the dough evenly thick. You can either form it into a circle or square. If you make the dough into a square shape, all the noodles become the same length when you cut them. Alternatively, if you find the dough too tough to stretch with a rolling pin, you can use a pasta attachment on a stand mixer to stretch it. Make the dough into about ¼ inch thickness.

Scatter the cornstarch on the dough surface and fold in thirds; just like you fold a letter to fit in an envelope, pull an edge from one side to the centre and another from the other edge to the centre, overlapping. Cut into ¼ inch thickness with a sharp knife. The key is to match the width of the noodle with the thickness of the dough to make nice shapes. As you cut, fluff the noodles to prevent them from sticking to each other. If you don’t want to cook all the noodles, you can divide them into smaller portions and freeze in airtight bags (remove the air as much as possible so as to avoid freezer burn). Consume within 2 months for the best flavour.

Boil water in a large pot. You need about 5 L of water to cook 400g of noodles per 3 people. Cook the noodles until done, for 12 to 13 minutes. The thicker the longer it takes to cook, so if you are not sure about the doneness, cut a piece of cooked noodle and see if the centre part became translucent. Adjust the heat accordingly to avoid spilling the hot water.

Drain the noodles and rinse with cold water. Drain completely and serve a portion in each bowl. Pour the hot soup over the noodles and top with green onions.

“Itadakimasu.”


Goboroot Turns 1 Year Old!

deep fried gobo

It’s kind of late for “Happy New Year” but I wish all of you fantastic readers out there a great year with lots of love, peace, great health and of course, good food!

Since we came back from our trip to Japan almost a week ago, things have finally started to settle down. Although I’m still lingering over the vibrant memories that we created with our friends and family during the trip, I am refreshed and very much looking forward to another exciting year to come.

I meant to upload some photos during the trip in Japan, but then there was so much happening in the city, so many materials to see and so much scenery to observe. So I decided to live in the moment, completely abandoning the idea of posting news, totally cutting myself off from emails and online activities and soaking up the culture that I had truly missed. This act really helped me a great deal to feel rejuvenated and renewed. No computers, no Internet. I even enjoyed using pay phones everywhere we went; however, it was very hard to spot them! I appreciated the simple things in such a technologically advanced country.

As I was wondering what I would post for goboroot’s 1-year anniversary, I  received an email in the nick of time from one of my readers asking if I had a recipe for gobo “French fries” in my archives. He was on a business trip to Japan last week and seemed to have enjoyed lots of gobo in many different dishes. What better way to celebrate the website’s anniversary than to share this delicious recipe! I quickly went into my kitchen and used the last batch of gobos I had saved from last year, turning them into these mouthwatering snacks. Oh, it was a worthy usage of my precious gobos!

sweet & salty gobo

So thank you for the great inspiration, Mike. Comments like this from readers have always kept me inspired to update my blog and have encouraged me to pursue my journey. So a big THANK YOU to everyone who supported me along the way!

I will post some photos from the Japan trip with some news very soon. So stay tuned!

horizon

Deep Fried Gobo

Serves 4

1 lb gobo, preferably organic

Sea salt

All purpose flour

Cornstarch

Vegetable oil

Wash gobo root thoroughly to remove the dirt. Using the back of a knife, remove coarse hair and skin. You can leave some skin on, as it is said by Japanese culinary experts that the skin contains more nutrients.

Cut into ¼ to ½ inch strips and soak in cold water for 10 minutes. Continue to change water until it becomes clean.

Fill a large pot with water and cook the gobo on high heat until tender (but it should still have a bite to it), for about 10 minutes. Drain well and pat dry.

Heat the vegetable oil in a deep frying pan to 180C. Combine the salt, flour and starch in a large bowl. Add the gobo, coat well with flour mixture and then remove excess flour.

Deep fry until the gobo turns a golden colour. Sprinkle salt over top if you like. Serve hot.


Caramelized Sweet and Salty Gobo

If you have any leftovers, try this recipe, as we frequently devoured them with a big bowl of rice for breakfast while in Japan. Thanks to my auntie, who enthusiastically introduced this dish to us along with mentaiko (spicy raw Pollock eggs) and nori in the morning.

Leftover deep fried gobos

1 tablespoon brown sugar (I used Okinawa black sugar and loved the rich flavour)

2 tablespoons soy sauce

Roasted white sesame seeds

In a medium pan, heat the sugar and soy sauce over medium heat until bubbling. Add the gobos and stir continuously to mix until the texture of the sauce is sticky. Sprinkle sesame seeds over top. Serve hot or at room temperature with some rice.