MEAT & BREAD

Meat&Bread

Since there is not much excitement in my garden right now (besides that which I get from snipping arugula and spinach leaves and admiring flowers on potato plants…), I thought I would share my first experience at MEAT & BREAD in Gastown, Vancouver.

As I’ve always seen long lines plus a huge crowd of people inside and out in front of the restaurant, I was worried that we might not get seats when we arrived around lunch time. Thankfully, it turned out that just before 2 pm was no so bad.

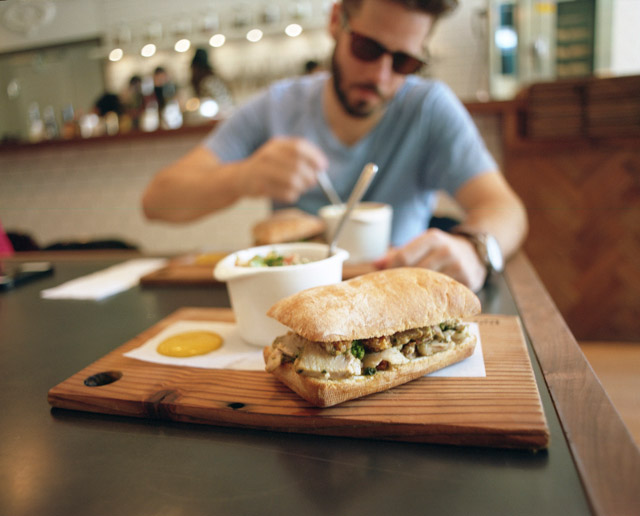
The place was so photogenic that I couldn’t stop myself from quickly snapping a few shots. The photographs shown here are only the tip of the iceberg, and I cannot wait to go back with a faster roll of film, especially to capture interesting props in the backside of the space and of course, to try their other sandwich varieties!

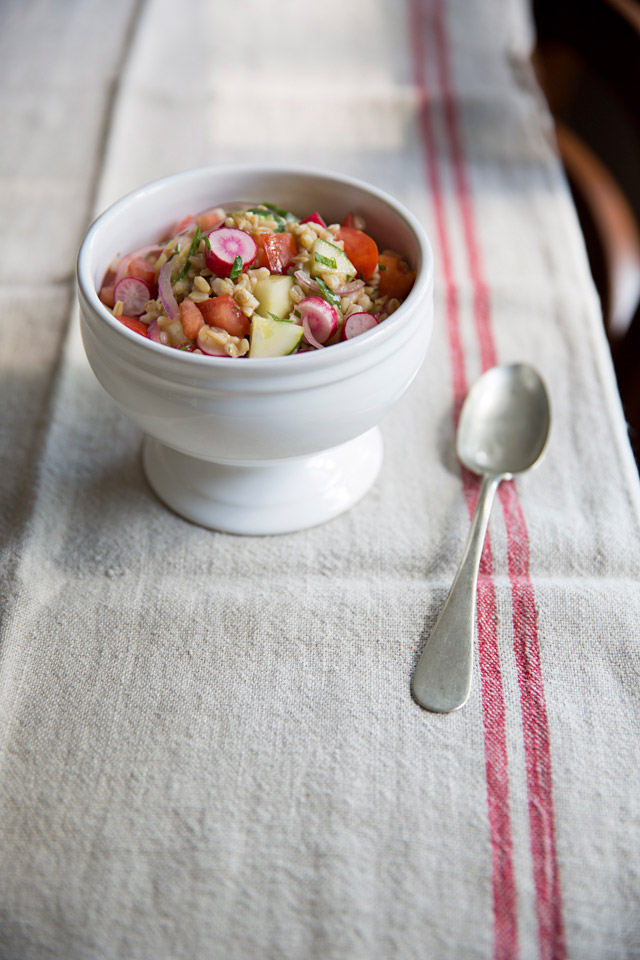
My porchetta sandwich, and what seemed a bowl of wheat bulgur (correct me if I’m wrong) salad, were absolutely delightful. The salad reminded me of the dish I used to make with couscous in the heat of summer days. So here I did my best to simulate the delectable salad I enjoyed at this restaurant. Hope you can visit this cool place on your next trip to Vancouver!

porchetta_sandwich Meat&Bread2MEat&Bread3Meat&Bread4Meat&Bread5 oat_groats_salad

Oat Groats and Radish Salad

I substituted wheat bulgur (I think) for oat groats, since this was the only close thing that I could find from my local organic store. In return, the salad got a chewier texture that I really enjoyed! Make sure you have extra, because it is so tasty the next day.

Serves 4 to 5

1 cup oat groats

3 cups chicken or vegetable stock, or water

¼ teaspoon sea salt

½ red onion, thinly sliced

1 cup cucumber, cut into ½ inch cubes

2 tomatoes cut into ½ inch cubes

1 bunch radishes, leaves removed and sliced

A few leaves of parsley, finely chopped

Lemon juice from ½ lemon or to taste

A few swirls of extra virgin olive oil

Salt and freshly ground pepper

Rinse the groats. Bring the groats, stock and salt to a boil. Cover, turn the heat down and simmer for 50 to 60 minutes. Remove from heat and let stand for 10 minutes.

Rinse the groats under cold water and drain well. Place in a large mixing bowl along with onion, cucumber, tomatoes, radish, and parsley.

Add the lemon juice and oil, and adjust with salt and pepper. Mix well and let stand for 20 minutes in a refrigerator or until serving time.


Katsudon – Pork Cutlet Bowl with Rice

katsudon2

Unofficially, I ended up sorting through Japanese recipes here in my March posts. As someone who has moved from one country to another, from city to city, I have never felt that I had a place to really call home. Japanese cuisine and, of course, my partner, are essentially my home, allowing me to  feel most comforted wherever I am; maybe that’s what I’ve been needing lately.

Undoubtedly, when I think of comfort food, katsudon comes to mind. I recall working at one of the reputable tonkatsu (specializing in pork cutlets) restaurants, called Wako, in Shinjuku during my university year, honing my skills in the kitchen with an enthusiastic Japanese chef and another chef who had French cuisine training under his belt. I learned not only how to cook but also why we cook. The ultimate answer was the pleasure of serving good and delicious food to those who love to eat! This mentality has always been inside of me, both before and after this experience, and to this day I remain unchanged. I wish I could track down those colleagues who cooked the most intricate and delicious lunches for us employees every single day–we had the greatest team in the kitchen!

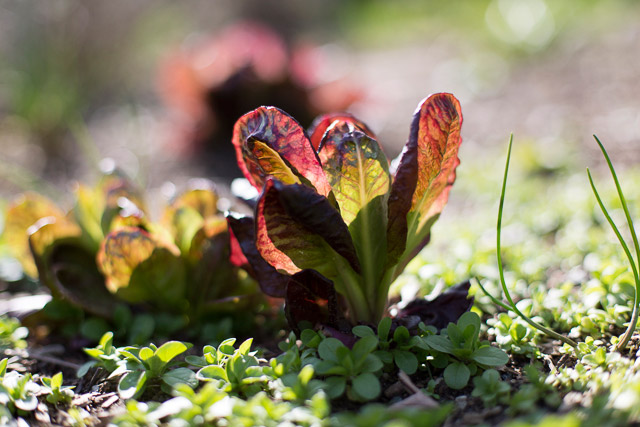
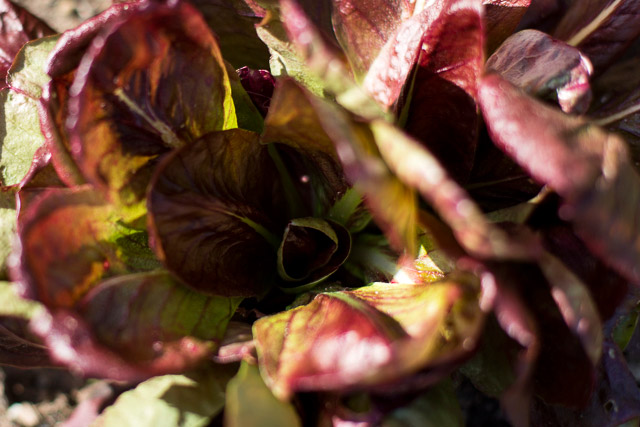
chive_plant3lamb's_lettuce_radicchio_chives radicchiokatsudon3

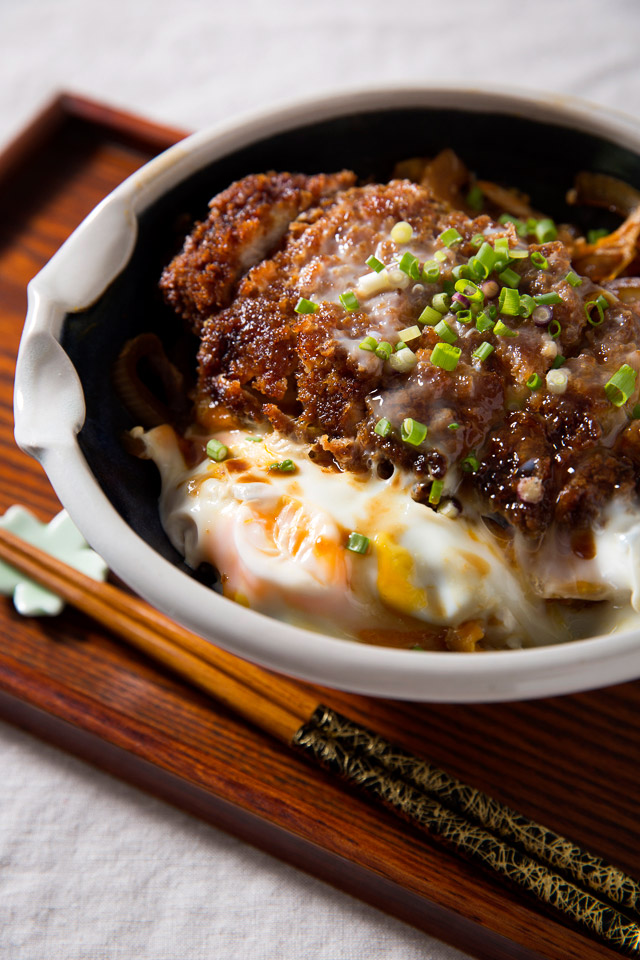
Katsudon – Pork Cutlet Bowl with Rice

The key to restaurant-quality katsudon is all about using good quality pork and bread (plus the secret sauce). My soba sauce recipe is very similar to what I used to concoct every week in a huge batch within Wako’s kitchen. Thus, I still make batches big enough to last for a few months in my fridge, and I ensure that they keep moving with me, wherever I go! The best texture is achieved by making your own homemade panko on which you nestle the pork, creating a veritable bed of sweet, fluffy panko. The size of the skillet matters as well; try to use the smallest one in which you can fit all the ingredients in order to ensure even cooking during the shortest possible time.

Serves 2

2 pork centre loin pieces, about 1 inch thick, boneless

Salt and pepper

All purpose flour

1 egg + 2 tablespoons water, beaten well

2 cups fresh white bread, torn in large pieces (for making panko)

Oil for deep frying

½ onion, sliced into ¼ inch pieces

3 tablespoons soba sauce or more to your liking

Or a mixture of 1 tablespoon sugar, 2 tablespoons soy sauce and 1 tablespoon mirin

2 eggs, beaten very lightly

Green onions, scallions or chives, chopped finely

Cooked white rice

Rinse and pat the pork until dry. Season with salt and pepper. Place the bread pieces in a blender and roughly grind until they look like large snowflakes. Don’t grind to the size and texture of store-bought panko, as larger flakes are key to making the pork cutlet fluffy and textured.

Prepare the breading station by placing flour, beaten egg, and breadcrumbs in separate shallow bowls.

Do one piece at a time. Evenly coat the pork with flour, removing the excess, and then coat with egg. Lay the pork on the bed of breadcrumbs and cover the top with plenty of the crumbs as well. Press gently but firmly. Refrigerate, covered with a piece of clean wrung cloth or Saranwrap, for at least 10 minutes to moisten the breading. This makes breading adhere well and ensures an ideal texture.

In the meantime, warm oil to 345 to 355 F in a deep-rimmed pan, enough for deep frying.

Deep fry the pork until golden brown. Flip when halfway done. Test the doneness by slicing the thickest part. It is finished if the pork is light pink in colour and the juice is clear. Rest the pork on a rack for 5 minutes. Slice into pieces that are easy for you to eat.

Place the soba sauce, or the mixture of sugar and soy sauce, plus 2/3 cup water in a small skillet over medium heat. Cook the onion until tender. Place the sliced pork pieces in the skillet, and pour some sauce over top; cook for a couple of minutes. Pour the lightly beaten eggs over top, cover with a lid and cook for another 15 seconds, until eggs are half cooked. Serve over the cooked white rice, scattering the green onions on top.


Kuri Gohan & Tonjiru

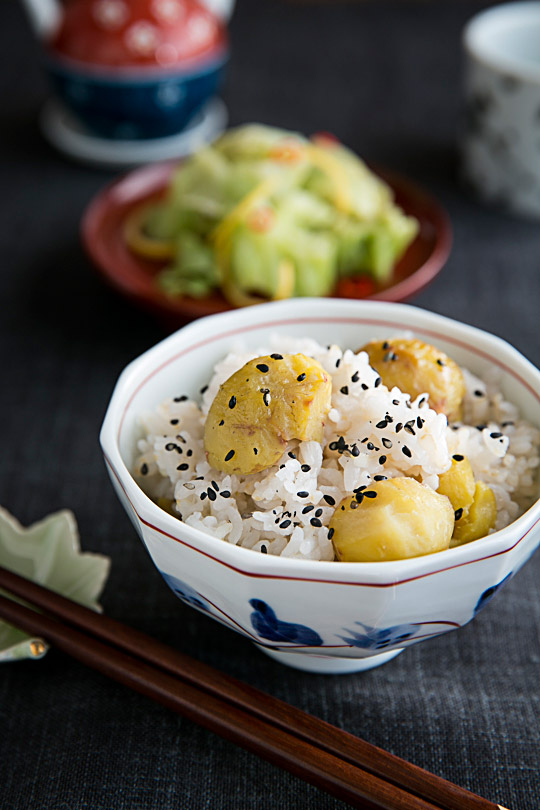
kuri gohan

After my mom left, many kind hearts looked after my sister and me. We were consoled by my grandma, our aunties and uncles, and my father’s colleague Mrs. Tajima. We were about 8 years old and Mrs. Tajima had children who were in junior high, so sometimes she came to our apartment to help us with chores or brought us to her house after school. This was when I discovered a love of chestnuts. Boiled, steamed or roasted, I loved eating these nuts, as to me they encompassed a whole autumn season on a plate.

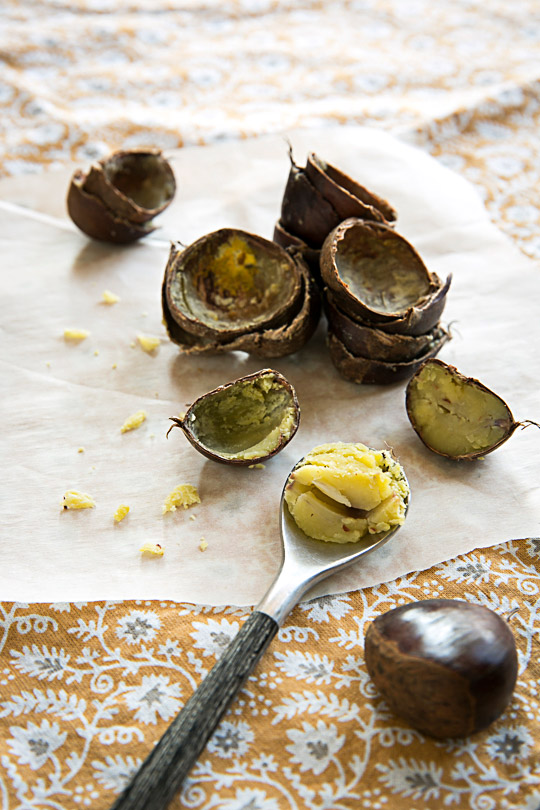
steamed chestnuts

Mrs. Tajima’s children taught us how to spoon the nutty dense meat out of the steamy hot chestnuts. My fingernails ended up all yellow and sweet, with hard brown shells piled up on a table. After working hard to extract the chestnut meat, we happily ate the delicious chestnuts with a glass of milk. Today, when I close my eyes and discern the flavour of each chestnut in the rice, I wonder how Mrs. Tajima is doing, and suddenly remember the way she wiped my wet hair in the evening light with me burying my head around her tummy and wondering if this was how my mother would smell. Cooking chestnuts always brings back this memory and the warmth of Mrs. Tajima.

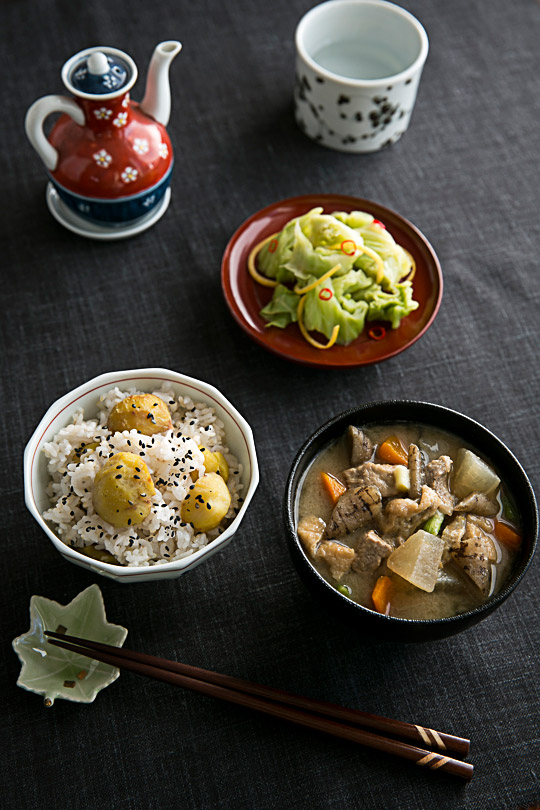
kuri gohan, tonjiru and ohitashi with cabbage

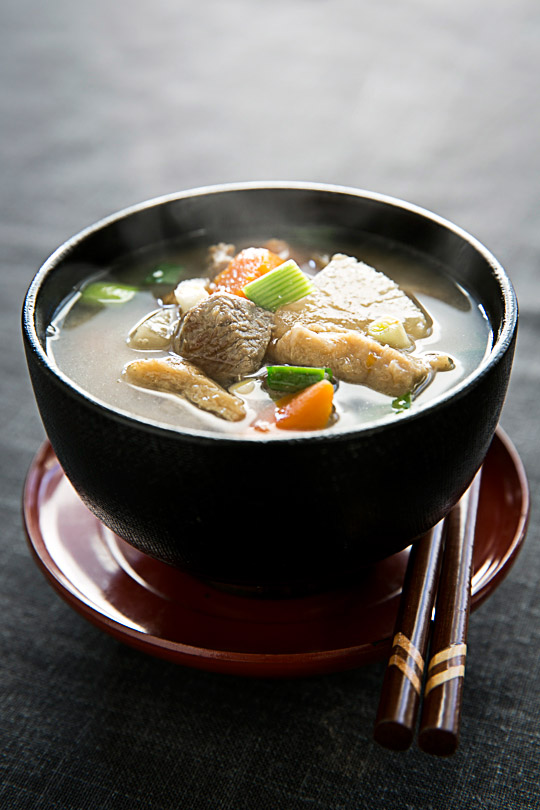
tonjiru

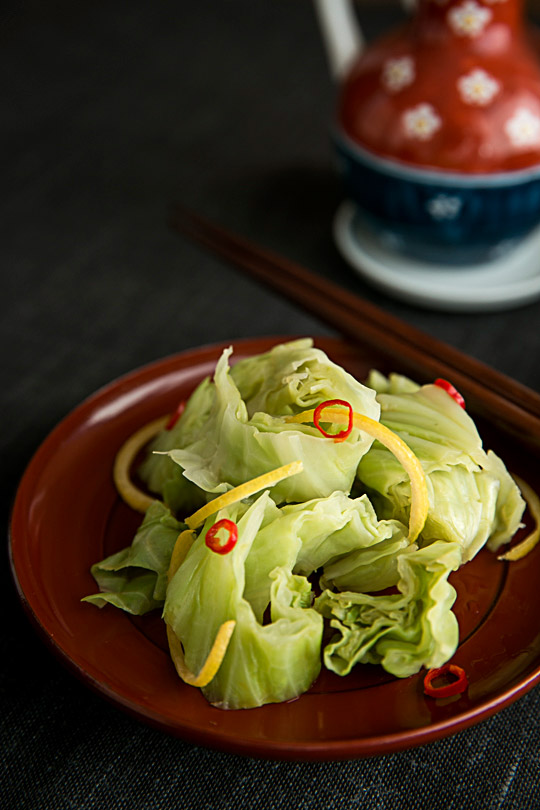
 ohitashi with cabbage

Kuri Gohan (Chestnut Rice)

Serves 6

30 plump chestnuts

1¼ cups white rice

1 cup (250ml) brown rice

2½ cups water

2 tablespoons sake

½ teaspoon salt

For sprinkling

Roasted black sesame seeds

Sea salt

Rinse the chestnuts, place them in a large bowl, and cover with cold water over night.

Next day, rinse the chestnuts and place them in boiling water for a few minutes. Let them cool off in the water. Peel the skin with a small knife, being careful not to break the chestnuts. Soak them in water for 30 minutes.

In the meantime, wash the rice well and change water a few times until water becomes clear. Place in the bowl of a rice cooker with 2½ cups water.

Rinse the chestnuts and drain well. Place the sake and salt in the prepared rice and stir to mix. Lay the chestnuts on top of rice evenly and cook (If you don’t use a rice cooker, you can cook the same way you normally cook the rice in a pot).

Combine the sesame seeds and salt in a small bowl. Serve immediately with sesame mixture lightly sprinkled on top.


Tonjiru (Pork & Vegetable Miso Soup)

I always make a plenty of this dish because the flavour gets even better the next day!

Serves 6-8

1 large gobo, skin removed and cut lengthwise and then, into 1 inch pieces

6 inch daikon, peeled and cut into 1 inch cubes

2 large carrots, peeled and cut into 1 inch cubes

1 tablespoon vegetable oil

1 tablespoon roasted sesame oil

1 lb pork centre loin chop, boneless, cut into 1 inch pieces

8 cups water

2 sheets abura age, cut into ½ inch strings

2 leeks, cut into ½ inch pieces

1/3 cup to ½ cup red miso and white miso (I like mixing half and half)

Soak the gobo in cold water, changing the water a couple of times until it becomes clear, about 20 minutes. Drain well.

In a large heavy bottomed pot, heat the oil over medium high heat and sauté gobo. Then, add daikon, carrots and pork until they are nicely coated with oil, for about 15 minutes.

Add water and bring to a boil. Skim occasionally and simmer for 30 minutes.

Rinse the abura age by pouring boiling water to remove the excess oil. When cool, squeeze the moisture out and add to the soup.

Add the leek and cook further, about 10 minutes or so.

Turn the heat down to low heat, place the miso in a ladle and melt gradually into the soup. Never boil miso soup, as this will destroy the subtle umami flavour.

Gentlly simmer for about 10 minutes.

Serve while hot.


Ohitashi with Cabbage

½ head of cabbage

½ organic lemon

1 Thai pepper, chopped thinly

2 tablespoon dashi stock or water

2 tablespoons soy sauce

Boil water in a medium pot and submerge the cabbage for about 5 minutes. Drain well.

In the meantime, extract lemon juice for about 1 tablespoon. Peel the rind and cut into thin strips for ½ tablespoon. Combine the juice, dashi and soy sauce in a small bowl.

When cabbage is cool, squeeze the moisture out and cut into ½ inch pieces.

Mix the cabbage, lemon rind, pepper, and lemon juice mixture and serve immediately.