It’s been springy for a few days, and then winter came back again with strong, cold winds and slushy rain. I have been reluctant to sow onion seeds in this weather or gardening at all for that matter. Although I picked up all my new seeds at West Coast Seeds last weekend, it looks like I will have to wait for a while to get active in the garden.
The only thing that is growing well now is the fall rye I sowed last November. The plants are as tall as 8 to 10 inches, and are waiting to be turned to help improve the soil for the new upcoming growing season. Weather like this makes me crave something homey, greasy and reminiscent of my childhood.
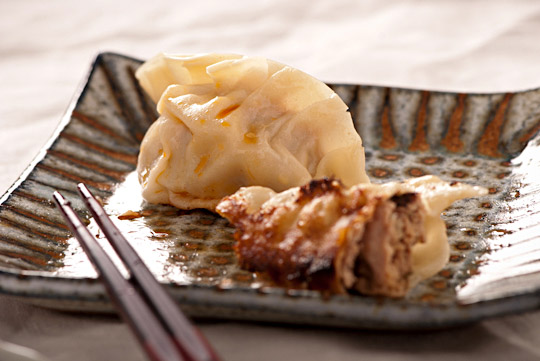
Making gyoza is a perfect way to spend the afternoon. This is a kind of dish around which all your family gathers and spends a good afternoon over a long conversation. I would very much enjoy making this dish with my sister, grandma, aunties and cousins, all women surrounding a table with some snacks to nibble and a cup of green tea… and that way, it is much quicker to finish. For now, I should stop drifting away into warm nostalgia and keep working because there are many more gyozas to wrap.
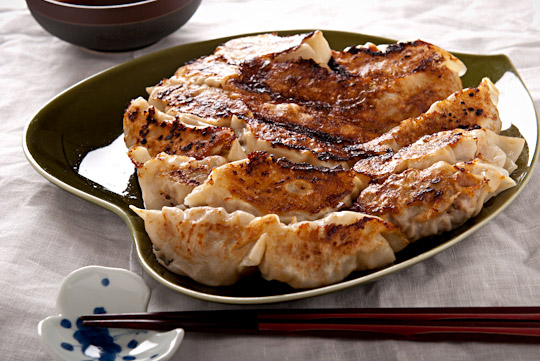
My dear friend Andrew suggested the wonderful idea to add some shredded carrot, which I had never tried. It turned out to be even tastier than my 15-year-old gyoza recipe. Thankfully, Pascal became a dough maker as usual, so the process went smoothly. Yes, this dish is also all about teamwork. Pascal never complains about being assigned this task, since he knows how tasty the hot, greasy, meaty, aromatic juice coming out of gyoza is when he first bites into it. It is so worth taking time to prepare this homemade gyoza. Freeze extras to enjoy later when you’re craving a quick treat.
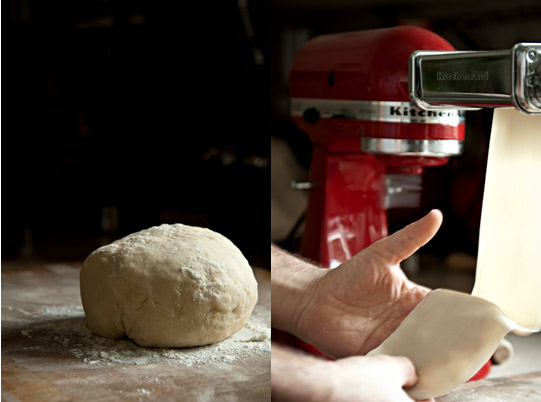
*I have made the skins using a KitchenAid artisan stand mixer with pasta roller attachment for the best thickness. You may use a kitchen roller as my friend Andrew does, but it may require expertise. If you want to skip the dough process, go get dumpling skins from an Asian grocery store.
Gyoza
Makes about 50 pieces
Skin
2 cups white unbleached flour (Anita’s Organic)
3/4 to 1 cup icy cold water
Meat mixture
1 lb ground pork
1 lb ground beef
1/4 medium onion, finely chopped
3 tablespoons garlic chives, finely chopped (I use regular chives when garlic chives are out of season)
5 large shiitake mushrooms, finely chopped
1 tablespoon ground ginger
1 small carrot, shredded
1/2 cup shredded cabbage
Marinade
1 tablespoon sake or white wine
1 tablespoon miso
1 tablespoon sesame oil
1 tablespoon soy sauce
1 teaspoon sugar
A pinch of salt
1 teaspoon corn starch
For Frying
Vegetable oil
Sesame oil
Water
Dipping sauce
1/4 cup Japanese rice vinegar, or more to taste
1/4 cup soy sauce, or more to taste
Chili oil to desired heat
Make the dough first by mixing the flour and the water rapidly with 2 to 4 chopsticks in a large bowl. When well combined, use hands to knead the dough for 5 to 7 minutes. The dough tends to be hard but this makes skin solid so that it doesn’t tear when the gyoza are fried and steamed. If the dough is too soft and sticky, add a little bit of flour. Keep the dough in an airtight bag and let rest in the fridge for 30 minutes.
In the meantime, make the meat mixture. Combine the pork, the beef, the onion, the garlic chives, the shiitake, the ginger, the carrot and the cabbage using the back of a large folk or your hands. Set aside. Combine the marinade in a small bowl and whisk until the sugar dissolves. Drizzle the marinade over the meat mixture. Using the folk or hands, mix well and let sit for at least 10 minutes in the fridge.
Take the dough out of the fridge and divide into golf ball sized pieces. Start by flattening one piece, and put the flat dough through the pasta roller attachment using dial 2 to stretch the dough gently. Then, adjust the dial to 5, and again put the dough through the attachment. At last, adjust the dial to 7, and finish the last stretching. The dough should be thin enough to wrap around the meat mixture. Repeat for the rest.
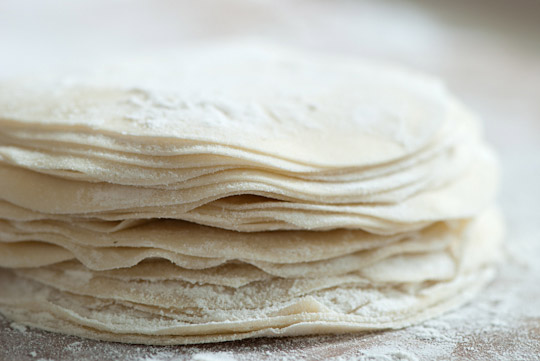
Cut out a circle, about 3 1/2 inches in diameter, from the thin dough. If you pile the gyoza skin up, you need to sprinkle flour in-between to prevent them from sticking to each other. The secret to good gyoza is to have a solid skin without holes to keep the cooking juice inside.
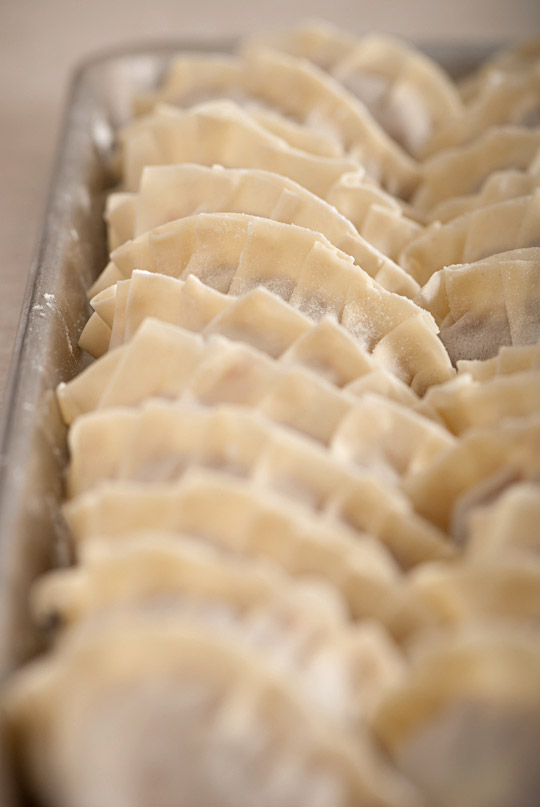
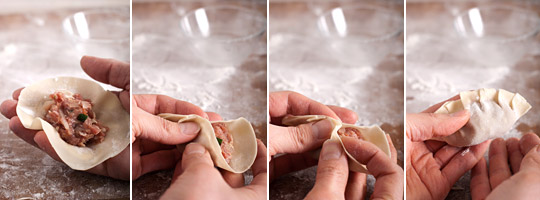
Take out the meat mixture from the fridge. Prepare a small bowl of water for folding skins. Scoop out the meat mixture, about 1 tablespoon, and place on a skin, then fold the skin in half. Place a little bit of water inside of the edge of the skin and close the skin by making pleats (see the photograph). Place on a floured baking sheet. Sprinkle some flour in-between the gyoza to prevent them from sticking to each other. Repeat until you finish the mixture. If there is some dough left, you can wrap it around a cubed cheese and pan-fry until nicely browned. My grandma used to make this as an appetizer!
Heat a non-stick frying pan or well-seasoned frying pan with 2 tablespoons or so vegetable oil over medium high heat. When the oil starts sizzling, fill the frying pan with gyoza and fry until nicely browned. Add water up to a third of the height of the gyoza, about 1/2 to 3/4 cup, and put a lid on to steam them for about 8 minutes.
When the liquid starts bubbling and becomes starchy, add 1 tablespoon of sesame oil and swirl the frying pan to let the oil reach the bottom of the gyoza. Cook until they are crisp.
The best way to transfer the gyoza to a plate is to hold the frying pan on one hand, keep the lid on top with the other hand and flip the frying pan upside down so that the gyoza sit on the inside of the lid. Slide the gyoza onto a plate from the lid gently. This way, you can prevent tearing the precious skin. Way too much work, eh?
Serve while hot with the dipping sauce. A bowl of brown/ white rice makes an excellent accompaniment for this dish.

